Showing posts with label dispersion. Show all posts

19 Nov 2019

Marengs av egg, eller kikerter?

Oppsummering av matverksted 11/2019

Vi er nok flere som ikke har tenkt alt for hardt på alle de ulike mulighetene vi har når/hvis vi skal lage marengs. Det finnes flere ulike typer marengs som brukes til ulike ting: klassisk (fransk), italiensk, sveitisisk. Og de seinere årene har vi lært at vi ikke en gang trenger egg når vi skal laget det; bare åpne en pakke med kikerter, sil av væsken og pisk i vei. Men smaker det likt? Gir det samme konsistens? Må den varmes opp mindre, like mye, eller kanskje mer? Vi testet ut dette vårt åpne matverksted hos Klippfiskakademiet i Ålesund 11. november.

Marengs - En enkel (og ganske ufullstendig) oversikt

Fransk marengs 
Metode: Bland eggehviter og sukker, pisk, stek i ovn.
Egenskaper: Blir sprø, kan være myk inni
Bruksområde: pikekyss, pavlova osv.

Italiensk marengs
Metode: Varm opp sukkerlake (til f.eks. 119 °C). Pisk eggehviter, hell sukkerlaken i en tynn stråle mens du pisker.
Egenskaper: Blir seig og relativt "kremete"
Bruksområde: F.eks. topping på pai som deretter brunes med gassbrenner

Sveitsisk marengs
Metode: Bland eggehviter og sukker, sett bollen på damp-/vannbad og rør/pisk til blandingen holder en viss temperatur. Ta til side og pisk stiv (finnes dog i flere ulike varianter)
Egenskaper: Blir seig og relativt "kremete"
Bruksområde: Vanlig som base der man etterpå pisker inn mykt smør/margarin for å få krem/topping til cupcakes ol.

Aquafaba-marengs
Marengs der eggehvite er erstattet av vannet/væsken fra f.eks. kikerter. Vegansk alternativ til eggehvite. Aquafaba = vannet fra hermetiske kikerter eller andre belgfrukter (fra latin: aqua = vann, faba = bønner).

Problem/spørsmål

Ulike marengsoppskrifter gir ganske ulike fremgangsmåter, særlig for den sveitsiske typen. Hvor mye må man varme? Noen sier 85 °C, andre ber om langt lavere temperaturer. Noen steder oppgis ikke temperatur i det hele tatt. Hva er rett? Egg vil jo bli kokt ved så høy temperatur som 85 °C, vil det ikke? Og gjelder samme regler når vi skal lage marengsen av kikertvann, eller er det helt annerledes?

Litt bakgrunnskunnskap

Når vi pisker luft inn i eggehviter eller kikertvann lager vi et skum, akkurat som når vi pisker krem av fløte. Begge to er et væskeskum/flytende skum:

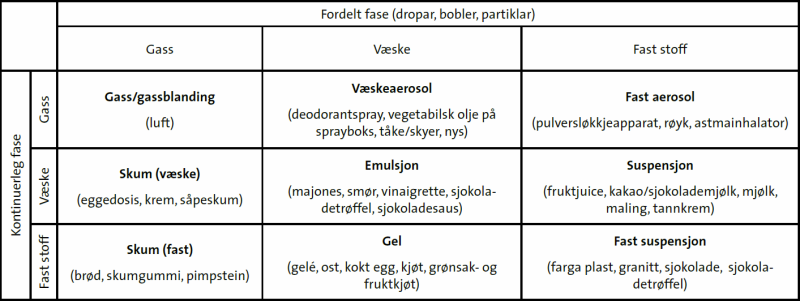
Diagram fra artikkelen Sjokolade er ein dispersjon på naturfag.no/mat

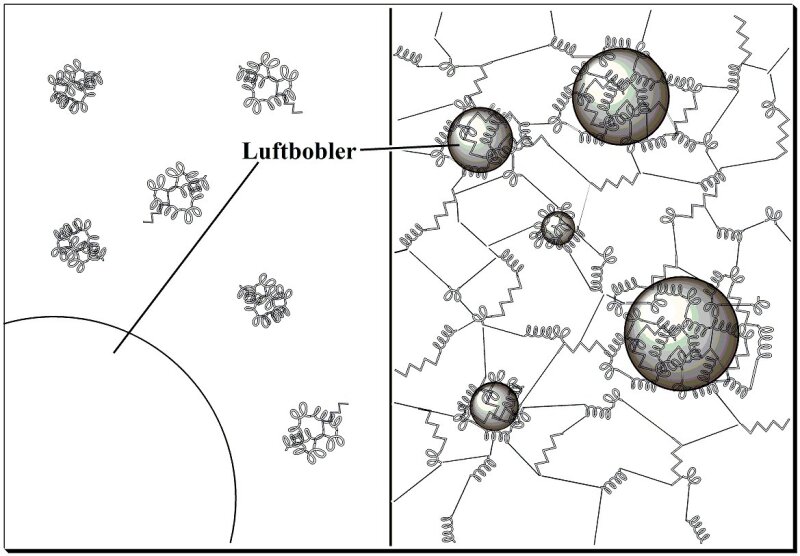
Et eggehviteskum blir til. Fra artikkelen
Å fange luft med egg på naturfag.no/mat
Forskjellen på fløteskum og eggehviteskum er at mens det i fløteskummet er mikroskopiske fettklumper som klistrer seg sammen og holder på lufta, er det proteinene i eggehviten som lager et nettverk som omgir og holder på luftboblene man pisker inn i eggehviten.

Sukkeret gjør at vannet som omgir boblene blir mer tyktflytende (visøkst), noe som også hjelper til med å holde skummet stabilt fordi vannet ikke renner så lett av boblene.

Hva så med aquafaba, kikertvannet? Jeg har ikke konkret informasjon om innholdet i selve kikertvannet, da næringsstoffoversikten på kikertpakkene naturlig nok også omfatter kikertene og ikke bare kokevæsken. Det finnes noe forskning området, men dette er ganske ferske saker og det er f.eks. lite å finne i fagbøker; det meste må man grave fram fra forskningsartikler eller mindre formelle nettsteder. Siden belgfrukter inneholder både stivelse og proteiner kan begge disse spille en rolle i å stabilisere skummet. Hvis stivelsen er viktig burde vi vente at det krevdes mer oppvarming for å få hjelp fra denne, akkurat som når man koker saus med potetmel, maizena eller hvetemel som jevning. Proteiner er så mangfoldige at her er mye åpent. Bordet var således dekket for et dobbelt sammenligningsforsøk: både mellom egg og kikerter, og mellom ulike temperaturer.

Forsøksoppsett

Vi laget fire parallelle sveitsiske marengser:
  • Eggehvite, varmet til 60 °C
  • Eggehvite, varmet til 80 °C
  • Kikertvann, varmet til 80 °C
  • Kikertvann, kokende
Variant med eggehvite Variant med kikertvann
3 eggehviter 200 g silt kikertvann
180 g sukker 200 g sukker
2 krm hvit eddik 2 krm hvit eddik

I de tre første parallellene rørte vi sammen sukker og eggehvite/kikertvann, varmet det opp over kokende vannbad til ønsket temperatur (damp, ikke direkte kontakt med vannet). Trekk til side og pisk til den ikke blir stivere, maks 10 minutter. I fjerde parallell ble kikertvannet kokt til det fikk en noe tykkere konsistens, sukker tilsatt og satt kjølig. Deretter tatt ut og pisket til stiv, inntil 15 minutter.

Nærmest for moro skyld prøvde vi også å steke topper av de fire i ovnen, og vi testet hvordan de fungerte når de ble brunet under gassflamme. Det skulle vi ikke angre på.

Resultater

Denne gangen fikk vi svært så klare resultater, nesten overraskende tydelige. Ofte er slike blindsmakinger vanskelige, og stemmene fordeler seg gjerne på de ulike parallellene. Denne gangen var det flere tilfeller der samme prøve fikk alle stemmene.

Resultat fra blindsmaking av de fire parallellene av sveitsisk marengs

Utseeende til de fire etter ulike behandlinger var også ganske opplysende:
Før steking/bruning

Etter bruning med gassbrenner (en anelse for mye; forfatteren tar det fulle ansvar)

Etter steking i ovn

Vi samlet også inn beskrivende ord for de fire:


Oppsummering

Det synes tydelig at temperaturen spiller en stor rolle, kanskje mer enn råvaren, når det gjelder konsistens på skummet. Dessverre hadde vi en type kikerter med ganske mye tilsatt salt (0,8%), så dette bidro til ganske mye saltsmak. Men selv uten salt var det tydelig at kikertsmaken stakk igjennom, i hvert fall når marengsen ble smakt alene. Vi har tidligere testet fransk marengs av aquafaba/kikertvann som deretter har blitt stekt, og da er kikertsmaken svak, nesten umerkelig. Og skal marengsen tilsettes andre smakssterke ingredienser vil de kanskje overdøve ertesmaken? Når panelet fikk velge den de foretrakk trakk eggehvitene helt klart det lengste strået, men kanskje er det likevel potensial dersom man leker seg litt med ingredienser, temperaturer og framgangsmåte?

Våre finske venner med matforsker Anu Hopia og kokk/kokkelærer Tatu Lehtovaara i spissen gjorde nesten samme forsøk samme kveld, bare med litt lavere temperaturer på eggehvitene. De kom faktisk til ganske lignende resultater i den forstand at temperaturen syntes å ha kanskje enda større effekt enn råvaren. I begge tilfeller fikk eggehviteskum varmet til 60-65 °C flest stemmer for mest foretrukket, men det er kanskje like mye et spørsmål om hva man skal bruke skummet til?


25 Dec 2010

New chocolate & dispersion article out in Norwegian school science periodical

A popsci article on chocolate truffles/ganache and dispersions recently published in the Norwegian school science periodical (print and web).

As a starting point for the text, I use a recipe for chocolate ganache from the Oslo chocolatier Deux chocolatiers. From there, I describe chocolate and ganache as dispersions and how we can understand the structure/texture of chocolate, why chocolate seizes and where chocolate ganache/truffles come into the picture. The article can be found at www.naturfag.no/mat:
Also, recommendable is Anu's blog molekyyligastronomia with two entries recently on chocolate ganache (look forward to the day comes that google translate deals efficiently with Finnish grammar, though).

To round off the season, Muppet Show's own gastronomical column headed by the Swedish chef making chocolate Moose must be one of the ultimate Christmas treats treat wrap up the fooducation blog before Christmas holidays :)


Some more posts on chocolate

29 Jul 2010

"Anyone for aN 'espresso?" - Machine made coffee seen through transparent glass

A short summer reflection: I've never thought about looking through a cup of espresso, or lungo, or americano, until this holiday. To my surprise the lungo is not always homogeneous (it shouldn't have been, however).

At the house we are exchanging for this summer, in the middle of Paris :), there is a Nespresso machine. At home, we have an rather ordinary/mainstream espresso machine, whereas Nespresso claims to give you a good cup of espresso or lungo without all the hassle: insert one of the many varieties of ready made coffe capsules, press the button, and you get a good(?) cup of espresso without the need for grinding, cleaning etc.


6 Jun 2010

Foolproof chocolate Chantilly, part 3:3. Dark chocolate mousse w/orange


This is the third post on chocolate mousse; pure and clean
containing only chocolate and flavourings. The process is very straightforward, although this dark variety might be the most tricky one among the three published. However, 'tricky' is not really that tricky...

This post is the last on chocolate mousses for now: white-, milk- and dark chocolate. Previous posts are
Refer the two previous ones for discussions on the how's and why's on this way of making chocolate mousse. This time, I'll get to the point right away.

9 May 2010

Foolproof chocolate Chantilly, part 2:3. Earl Grey milk chocolate mousse with coffee/cocoa nibs

Numerous blogs, web sites and newspaper articles have picked up variations of the "molecular gastronomic recipe" for making chocolate mousse with only chocolate and water first presented by Hervé This. However, most these recipes tell you to try-and fail. I have for some time felt that there is a need for making this recipe foolproof. And on top of it all, it's quite straightforward to make as long as you're precise with the measurements.

This post is the second out of three on chocolate mousses: white-, milk- and dark chocolate. Part 1 was white chocolate mousse w/ginger. I've chosen to give recipes for mousses with added flavours rather than the pure ones. Hence, the recipe might not work out properly if other ingredients, or pure water, is used as liquid.

The main reason for doing these experiments is that most of the recipes on the "molecular gastronomic mousses" tell you to try and fail until you're satisfied. That's ok if you are to serve the mousse right away. However, the mousse will firm up upon storage, starting after 1-2 hours I want a recipe I can trust even when the mousse is kept in the fridge, not having to make it or, even worse, repair it while the guests are waiting.

Video shows texture of mousse after one night in the fridge made according
to recipe below. Also some microscope pictures of the same mousse

EARL GREY MILK CHOCOLATE MOUSSE/CHANTILLY
4 portions

25 Mar 2010

Foolproof chocolate Chantilly, part 1:3. White chocolate mousse with ginger

Numerous blogs, web sites and newspaper articles have picked up variations of the "molecular gastronomic recipe" for making chocolate mousse with only chocolate and water first presented by Hervé This. However, most these recipes tell you to try-and fail. I have for some time felt that there is a need for making this recipe foolproof.


This post is the first out of three on chocolate mousses: white-, milk- and dark chocolate. I've chosen to give recipes for mousses with added flavours rather than the pure ones. Hence, the recipe might not work out properly if other ingredients, or pure water, is used as liquid.

The main reason for doing these experiments is that most of the recipes on the "molecular gastronomic mousses" tell you to try and fail until you're satisfied. That's ok if you are to serve the mousse right away. However, the mousse will firm up upon storage, starting after 1-2 hours. I want a recipe I can trust even when the mousse is kept in the fridge, not having to make it or repair it while the guests are waiting.


Video shows texture of mousse after one night in the fridge made according to
recipe below. Also some microscope pictures of the same mousse


26 May 2009

Chocolate part 3:3 - making your own instant cocoa

During graduate studies, we often wished for a "journal of unsuccessful chemistry" for the benefit of all the failed experiments we do. What if there was a journal where we could look for the experiments we were planning, and see if someone else had tried it and failed? This is one of those stories.

Cocoa powder has this property that it is hardly wetted by water. The result is
  • when making cocoa, thorough agitation or stirring is necessary to avoid lumps and cocoa powder floating on top
  • eating plain cocoa powder is not a very pleasant experience
In my search for info on why chocolate seizes (chocolate part 1:3) and shaping chocolate (chocolate part 2:3), I came over three papers on the wetting properties of cocoa and cocoa granules. In short, they stated that if I could turn cocoa powder into a granulate rather than the fine powder it is, it might disperse more easily because it'll interact better with the water molecules. Also, I figured, it might taste better in it's dry state as it's easily wetted by the saliva in my mouth.

Would it be possible for me to make my own instant cocoa, or maybe some palatable cocoa powder for sprinkling on top of dishes? If so, I could make my own blend and use quality cocoa rather than the sugar-loaded mixtures that are sold in grocery shops.

Granulating cocoa powder
Omobuwajo et al. brought about an easy method of making granules that are readily wetted by water. They simply heated the cocoa powder on metal plates. No need for expensive industrial machinery and additives. They investigated the granulation related to various cocoa-to-sugar ratios and conclude that the two best instant cocoa mixes were made by rapid heating of sugar and cocoa in 3:1 and 4:1 ratios, using fine sugar (0.23 mm), giving granules of 0.18 mm size. Now, if heated metal plate = skillet on my stovetop, I might make my own instant cocoa powder, or...?

A mixture of 9 g plain cocoa powder and 27 g sugar was heated in a pan on medium high heat (a little below maximum) with continuous stirring for 5 minutes.

Result: yes, the cocoa is granulated (right). No, I was not able to make granules that disperse more easily in a reproducible manner (some times it was easily wetted, sometimes it wasn't). Also, the powder tasted somewhat different due to the heat treatment (surprise...), without being more palatable than pure cocoa powder mixed with sugar.

Conclusion: more testing is necessary, several parameters to vary (temperature, time, stirring). This might probably work, but I don't find this interesting enough to spend more time on experimenting.


Wetting properties of cocoa powder
Wetting by water is closely related to whether something is hydrophilic or hydrophobic. If it's hydrophilic, it loves water and wetting occurs easily; water spreads out on the surface. If it's hydrophobic, the opposite occurs, such as on Gore-Tex. Wetting is not limited to water, and other solvents also possess wetting properties. These properties are in turn closely related to the surface energy. A general rule is that media/material with similar surface energies will possess similar wetting properties.

Galet et al. reported that the surface energy of cocoa powder is considerably lower than surface tension of water. Result: water and cocoa powder don't mix very well (surprise...). The bad dispersion behaviour of cocoa is caused by a number of phenomena, and one is the hydrophobic nature of cocoa, the fat content being 10–12% in cocoa powder. The mean particle size of cocoa is commonly around 16 micrometres (0.016 mm), but the size distribution is wide. The smaller the grains, the more difficult is the dispersion. Granulating the powder (making grains of 0.02 mm - 2 mm) resulted in enhanced wetting properties.

Partly, the bad dispersion properties is because of the bad flowability and the cohesive forces of the powder. The cohesion results in solid agglomerates, and the shear forces are not sufficient to break the cohesive forces between the grains. In plain words: cocoa powder lumps up in water, simply floating on top (another surprise...).

Cocoa powder in alcohol
A conclusion that may be drawn by this, is that liquids with lower surface tension (surface energy) than water might wet cocoa more easily. Galet concludes that liquids with lower surface energies than 40 mN/m will wet the cocoa powder, and that less than 15 mN/m will give perfect wetting. Water has surface energy 72 mN/m, not to wonder why cocoa powder and water doesn't mix well. However, alcohol (ethanol) has surface energy 22 mN/m, and a 40% ethanol in water mixture has surface energy 41 mN/m.


Conclusion: making cocoa flavoured alcoholic drinks should be easier than water-based ones.


References
Galet et al. "Improving the Dispersion Kinetics of a Cocoa Powder by Size Enlargement". Powder Tech. 2003, 130, 400-406.

Galet et al. "The Wetting Behaviour and Dispersion Rate of Cocoa Powder in Water". Food Bioprod. Proc. 2004, 82, 298-303.

Omobuwajo et al. "Thermal Agglomeration of Chocolate Drink Powder". J. Food. Eng. 2000, 46, 73-81.

On chocolate for education purposes:
http://www.exploratorium.edu/chocolate

http://expertvoices.nsdl.org/connectingnews/2009/02/04/the-science-of-chocolate-just-in-time-for-valentines-day

9 Apr 2009

Chocolate part 2:3 - shaping chocolate with a meat grinder

Peter Barham writes that chocolate is shear-thinning; it becomes fluid when shear stress is applied to it, such as by a meat grinder. I went on grinding...

A shear thinning, or pseudoplastic, medium is one that exhibits decreased viscosity when shear stress is applied. The most common example is probably ketchup. Turn the bottle upside down, and the contents stay put. Give the bottle a knock, and annoyingly half the bottle pours out. The same phenomenon is in action when a great landslide results from just a small shaking (i.e. quake) when the area resides on clay ground. Paints also rely on this phenomenon: they are runny when brushed or rolled, but become viscous as soon as the pressure is removed, and thus don't run down the wall.

Following Peter Barham's idea, I had another look in Beckett's "Science of chocolate", which confirmed that chocolate is shear thinning (I suspect that Barham indeed refers to Beckett). In addition, when the softened chocolate firms up again, after just a few seconds, it recrystallises in the same crystal form as before. This is important, because heating-cooling sequences (such as when melting melting) might lead to blooming, such as fat bloom.

My idea was hence: is it possible to use this property to shape chocolate and still avoid the need for apparently laborious and complicated tempering?

My only available equipment for applying shear stress on such a hard medium as chocolate was our kitchen machine with the meat grinder/mincer attached. Running the chocolate through this grinder, the result was what I've termed "chocolate twigs":


Comments on the result
I'm fairly content with the result, but my detailed knowledge of crafting chocolate isn't good enough for me to do a proper evaluation. Even though the texture seems fine, still a nice snap when braking, the colour and surface structure is changed. Maybe that's just OK? However, there are some relevant points to consider:

- The point is applying shear pressure, and not melting the chocolate
  • 55% dark chocolate worked fine, whereas milk chocolate softens too much in the grinder (becomes pasty)
  • the metal grinder needs to be kept cool, since grinding generates heat and might melt the chocolate. Cooling can be done by wrapping a cold moist cloth around the grinder
  • the chocolate was kept at room temperature overnight (20-25 °C), but taking the chocolate directly from the fridge did also work (in a previous experiment)
- Amount of chocolate
You need quite a lot of chocolate to produce a moderate amount of twigs. In the video above, I spent 400 g. However, the chocolate may be run several times through the grinder. The rest is of course perfectly OK for making other chocolate-based stuff, or maybe practice tempering chocolate...

Coarse or fine mincing screens?
The coarse screen (8 mm holes) was the only one that worked in my hands, as the finer ones resulted in too much resistance. Too much resistance results in clogging and eventually warming/melting the chocolate.

Equipment
Our Kenwood Major (800 W) did the job, but I felt that I overloaded it slightly, especially when it clogged. Dark chocolate is really hard stuff. It'd been fun having some professional extrusion equipment with enough power and temperature regulation allowing to make various shapes. Barham mentions using a pasta machine for "shear shaping" chocolate, but I doubt it'll be strong enough to shape the chocolate, rather than crumble it. Maybe it'll work with milk chocolate?

References
I didn't find any directly relevant scientific literature on this, and the two only references I've found mentioning this (briefly) are

Barham: "The science of cooking"
Beckett: "The science of chocolate"

Also, Corriher's "Cookwise" has quite a lot of information on dealing with chocolate (again, I've still not got my hands on a copy of Bakewise, unfortunately)

15 Mar 2009

Chocolate part 1:3 - why it seizes with just a little water, ...and what to do about it

Revised June 2nd 2015 

(Important: See the last set of comments for a critique which possibly requires some major revision to the text and figures).

If just a little amount of water finds its way into melting chocolate, it goes all grainy and solid - it seizes/curdles. There is really no fix to the problem. However, if some more water is added, the chocolate suddenly becomes fluid again. How come?

In three recent posts in the Swedish food blog Matmolekyler ("Food molecules"), Malin discusses the physics of chocolate. In the third one, the question arose on what really happens when a little water makes the chocolate go all grainy, and why adding some more water solves the problem. It made me start looking around in my "standard" food literature base: Corriher, McGee, Belitz/Grosch/Shieberle, Barham, Pedersen, Dahlgren. Although Corriher came closest, none of them had the answer to Malin's question: "is there an oil-in-water emulsion going on or something?". Finally, Beckett did have the answer, maybe not very surprising, since the name of the book is "The Science of Chocolate". However, it took some serious searching even in this book in addition to a few research papers. Hence, I expect to write a couple of more posts on chocolate since I've dug into the topic.

Chocolate seems like no easy medium to work with, and according to books on the topic I have to follow loads of specific directions in order to avoid failing. I've postponed it in fear of failing. The solution to the problem: start by failing on purpose!

The problem
It all starts when trying to melt the chocolate. (Cook)books say:
  1. the chocolate should be carved or cut into small pieces
  2. use low heat, preferably a water bath or double boiler , stirring continuously
  3. don't ever get water in the chocolate (either from the water bath or from moist equipment)
  4. (microwave oven might be used as an alternative, although carefully)

I have an inherent need of doing things as easy as possible, and using the double boiler method makes me go nuts waiting for the last bits to melt. To me, water bath equals splashing warm tap water around in the kitchen sink. In that respect, points 2-3 pose a problem, because getting water in the chocolate results in this:

Left: 100 g melted pure (55%) chocolate
Right: the same melted chocolate after adding less than a teaspoon of water

In fact, so little water is needed for this to happen that steam from a boiling pan might be enough to make the chocolate go grainy. When this happens, there is no way back to the pure chocolate. However, it is perfectly usable for other purposes such as chocolate sauce, ganache, drinking cocoa etc. Alternatives to using water bath or a double boiler principle. In stead of water bath or double boiler, I usually use the microwave or even melt the chocolate directly in the pot using low heat and stirring continuously (have to be very careful). However, I love sabotage experiments. When recipes tell me by all means not to do something, the little boy awakens and I go for it. And that's the point in this post: what happens when chocolate seizes?

To understand what happens one need to know what chocolate is...

Basically, chocolate is
  • cocoa fat (cocoa butter) - water repelling
  • sugar particles - water loving
  • cocoa particles - somewhat unclear*
  • lecithin emulsifier - water repelling and water loving
  • (for milk chocolate: milk fat and/or milk powder)
Chocolate is a dispersion, consisting of solids distributed in a fatty (continuous) phase. It contains miniscule cocoa particles (mean diameter ca. 0.016 mm) and sugar particles too small for our tongue to notice them as grainy when properly distributed. The sugar is hydrophilic (water loving), and repelled by the fat. An important function of the lecithin emulsifier is to build protecting layers around the sugar particles so that they don't separate from the fatty phase and give a grainy texture. The emulsifier is commonly lecithin (lecithin is also a natural constituent of egg yolk, and the main reason for why the yolk doesn't split into a fatty and a watery phase).

Schematic drawing of the above photos
Left: pure chocolate. Right: chocolate after adding just a little water

What happens when water gets into the chocolate?
In it's solid form, pure chocolate is a relatively stable system virtually free of water (0.5-1.5% by weight). When the chocolate is melted, the stable dispersion is challenged. If just a small amount of water (or steam) finds its way into the chocolate, the water molecules form droplets, since they don't want to mingle with the fat. Since water and sugar like to mingle, the sugar particles are wetted by the water. The result is "the sugar bowl effect", just as when a few drops of water are spilled into a sugar bowl. The tiny sugar particles in the chocolate become moist and cling together giving larger lumps (agglomerates). The result is an inhomogeneous mixture between these sugar agglomerates and the cocoa fat mixture. These won't mix evenly because the sugar has gone watery (the lecithin is probably not capable of stabilising such large amounts of hydrophilic constituents). Since sugar is a major ingredient in chocolate, it all goes grainy. A water content of 3-4% by weight is enough to make the chocolate seize. Since the chocolate might contain som water already the critical amount of added water might be as low as 1.5% by weight (1/3 teaspoon on 100 g, ref. Afoakwa et al.).

Add some more water, and everything is "fine" again
If the chocolate has seized, there is really no way back to the original chocolate. However, if some more water is added, the grainy mass magically turns silky smooth again. What happens is that the emulsion inverts; whereas fat was the continuous phase in chocolate, now water is the continuous phase and the fat is distributed/"dissolved" in the water:
Left: 100 g melted pure (55%) chocolate, seized with less than a teaspoon water
Right: the same chocolate after a tablespoon of water

A definite explanation of this was in fact rather difficult to find, and the only literature source stating this explicitly was in fact Beckett's book (The Science of Chocolate. Afoakwe also states this, but refers to Beckett's book). He writes that about 20% by weight water vs. chocolate is needed to achieve such a phase inversion, whereas Corriher writes that you need a minimum of 1 tablespoon water per 56 g (2 oz) chocolate. This roughly equals 30% 20% by weight. Note that this is total amount of water; if cream, butter or some other water-containing ingredient is used, this contribution counts.

Schematic drawing of the above photos
Left: seized chocolate. Right: after adding a tablespoon of water

Since chocolate contain plenty of emulsifiers, this emulsion might be quite stable and a good starting point to many wondrous things such as drinking cocoa, chocolate sauce, ganache/truffles, foam/mousse ("chocolate chantilly") or even a chocolate mayonnaise.

What might be taught/learned
  • dispersions: emulsions and solid dispersions
  • solutions/solubility, hydrophilic and hydrophobic properties
  • experimental and cooking skills (dealing with chocolate)
  • observational skills (what to look for in an experiment)


*Note: Some sources (Rowat et al., 2011, and these ppt slides by Naveen Sinha) state that the cocoa particles are hydrophilic (water loving) and that the emulsifier surrounds these rather than (or just as much) as the sugar particles. I have not been able to confirm this and have thus drawn it as neither water loving or water repelling. However, I've found a couple of papers stating that the cocoa particles in fact contain fat (points towards water repelling, see Do et al., 2011) and that the emulsifier primarily attaches itself to the sugar particles (Vernier cited in Svanberg et al., 2011).


References, scientific papers

Afoakwa, Paterson & Fowler: "Factors influencing rheological and textural qualities in chocolate - a review". Trends Food Sci. Tech., 2007, 290-298.
Do, Vieira, Hargreaves, Mitchell & Wolf: "Structural characteristics of cocoa particles and their effect on the viscosity of reduced fat chocolate". LWT - Food Sci. Tech., 2011, 44, 1207-1211.
Rowat, Hollar, Stone & Rosenberg: "The Science of Chocolate: Interactive Activities on Phase Transitions, Emulsification, and Nucleation". J. Chem. Ed.201188, 29-33
Svanberg, Ahrné, Lorén & Windhab: "Effect of sugar, cocoa particles and lecithin on cocoa butter crystallisation in seeded and non-seeded chocolate model systems". J. Food Eng.2011104, 70-80.

References, books with relevant information on the subject

Beckett: The Science of Chocolate (1. ed.). Cambridge : Royal Society of Chemistry 2000.
Belitz, Grosch & Schieberle: Food Chemistry (3. ed.). Berlin: Springer 2004.
Dahlgren, Ö.: Laga mat - hur man gör och varför. Stockholm : Liber utbildning, 1994.
McGee, H.: McGee on Food and Cooking. London: Hodder and Stoughton 2004.
Corriher, S.: Cookwise. New York: William Morrow 1997.
Pedersen, T.: Kemien bag gastronomien. Copenhagen: Nyt Nordisk Forlag 2005.

7 Feb 2009

My first spherification

Yes, I know. I'm six years late to be among the cool guys, but who cares? To me it's all about having fun and learning, and then being late is no issue.

As far as I know, spherification and it's related methods were introduced by El Bulli chef Ferran Adrià et al. some time after the turn of century. I has got a lot of attention, and a You Tube search on the term gives quite a few hits on demonstrations of DIY spherification.

The phenomenon is based on using hydrocolloids, that is compounds that can generate gels, mostly with water but other media are also know (oils and alcohol mixtures, that is). A good place to start is Martin Lersch's hydrocolloid recipe collection "Texture". A number of different gelling agents are being used, the most common household substances being gelatin and fruit pectin, the latter often used when making jams and jellies.

In this case I got my hands on some sodium alginate that I wanted to play with. When a mixture containing sodium alginate comes in contact with a calcium solution, the alginate starts to cross-link and a gel is formed. In this case, dripping a alginate-containing solution into calcium chloride generates small beads that are gelatinous on the surface and liquid in the centre. Alginate is somewhat sensitive to the pH, and sodium citrate might be used as a buffer to stabilise the pH at ca. 4-5 (all this information is found in the Textures recipe collection).

Sodium alginate is a polymeric carbohydrate-like compound which is soluble in water. When it reacts with calcium ions, cross-links are formed giving large three dimensional webs that become viscous/gel-like and holds water.


Strawberry spheres in sparkling drink (for lava lamp effect)
(Sparkling Chardonnay or non alcoholic cider are both fine)

Equipment
(immersion) blender
scale (0.1 g precision is needed)
some general kitchenware
disposable plastic pipette (7 ml) or plastic syringe (10-20 ml)
(pH strips)

Ingredients
frozen and thawed strawberries, 200 g
sugar, 25 g
sodium alginate, 1.9 g
sodium citrate1, 2 g
calcium chloride2, 2.5-4 g
water, 500 ml
Sparkling Chardonnay or non-alcoholic drink (i.e. apple cider)

Procedure (see You Tube for informative demonstrations)
For template, the recipe for Melon cantaloupe caviar taken from El Bulli's texturas recipes: The strawberries were blended and mixed with the sugar. pH measured to be ca. 3 (somewhat uncertain since the berries gave some colour to the strips). Sodium citrate was added gradually, stopping at a total of 2 g to get a pH of ca. 4-5.1 Sodium alginate was added and blended (the alginate partially turned into lumps; should have added the alginate to a small portion, mixed this, and then added the rest. Lots of blending did the trick). The mixture was strained through a sieve. For easier dripping (see below), the mixture was diluted 1:1 with water (the initial strawberry mixture was rather viscous, resulting in oblong or drop-shaped "caviars"). This would of course affect gelation, hence the amounts here are deduced on a try-and-fail basis.

Calcium chloride was dissolved in the water. The strawberry mixture was dripped into the calcium chloride solution, the drops forming small strawberry beads, and left for 1/2 to 1 minute.3 The beads were strained, rinsed in water and added to the sparkling wine or cider.

(Tri)sodium citrate functions as a buffer due to its three carboxylic acid functional groups.


Verdict
The strawberry beads/spheres/caviars tasted good, no detectable flavour from the matrix. Simply strawberry. While mixing, the strawberries turned somewhat greyish. Not surprising, since the colour is an anthocyanin pigment (anthocyanin colours are pH dependent, often bright red in acidic environment and more on the green/blue side in basic conditions).

The reason for using Chardonnay was simply that I found Chardonnay to match well with strawberries at the food pairing database, and that this might be a fun aperitif (although I would maybe not spend money on an expensive wine and then put strawberry in it).

What might be taught
  • chemical reactions might occur between chemical compounds
  • experimental and cooking skills (weighing exact amounts, diluting etc.)
  • dispersions: gels (hydrocolloids) and macromolecules
  • pH, acidity and buffers (citrate)
  • density (the beads float up together with the CO2 bubbles, and sink when the bubbles burst)
The procedure is somewhat complicated, and I'm glad I didn't bring the kids the first time. When the table was set, and the solutions were ready, the kids loved dripping the solution making beads. Now I've got some experience, and next time I'll bring them along from the beginning.

Notes/comments
1 It was difficult to assess the pH correctly, and the amounts of sodium citrate suggested in the textures recipe collection did not (seemingly) have the desired effect. Hence, citrate was added until the desired pH, adding up to 2 g.

2
The CaCl2 must be dry/dehydrated. In my case, it had absorbed moisture from the air and gone all wet (quite hygroscopic). It was in left in shallow bowls in the oven at 150-200 °C stirring occasionally. A couple of hours later, a white crystalline/powdery salt was left.

3
Using 2.5 g CaCl2 per 500 ml water and leaving the beads 30 seconds in the bath resulted in rather soft beads. Leaving them for one minute gave beads that were solid almost throughout. I wanted firmer beads with a soft interior. Increasing the concentration to 4 g CaCl2 per 500 ml water did the trick: firm shell, and liquid interior when the beads were left in the bath for somewhat less than a minute.


References
McGee, H.: McGee on Food and Cooking. London: Hodder and Stoughton 2004.
Lersch, M.: Hydrocolloid recipe collection

20 Dec 2008

Leavens in cookies - theory and practice

Recently, I published a popular science article in Norwegian. Title might be translated "Christmas cookie chemistry, ...and some physics" on www.naturfag.no/mat. Focus is testing the effect of using different chemical leavening agents on the same cookies (yeast is hence not the issue here). A summary follows.

All photos (unless otherwise stated): Erlend Krumsvik


Why do some recipes require baking powder, others ask for baking soda, and yet others want hartshorn (baker's ammonia). For some cookies, various recipes for the same cookie even ask for different leavening agents. Puzzling...

(In writing this, I've realised that hartshorn is a rather rare ingredient in English speaking countries(?), even though it's still common in Scandinavia, and possibly also in central Europe. See references in the end for some information)

The chemistry, in short
  • Baking soda = sodium bicarbonate = NaHCO3. Requires acidic ingredient in order to produce CO2 (but see below)
  • Baking powder = baking soda plus (most commonly) two solid acids, one reacting at room temperature whereas the other doesn't react before heated. Does not require acid but does require water in order for the reagents to react.
  • Hartshorn = bakers ammonia = ammonium bicarbonate = (NH4)(HCO3). Does neither require acid nor water (but water may be used if required by other reasons). Reacts at higher temperatures only.
The two former produce CO2, whereas the latter produces both CO2 and ammonia (NH3). In all cases, gas production results in bubble expansion, giving porous and levened cookies.

Physics, in short
Either whipping eggs with sugar or creaming butter + sugar generates bubbles. When placed in the oven, the air in the bubbles expand and (more importantly) water evaporates expanding the bubbles.

Discussion
Both baking powder and hartshorn do not require any other ingredient to work properly.

Baking soda, however, needs some acid (i.e. lactic acid from sour cream or buttermilk, syrup etc.). Heating pure baking soda releases some gas, but half of the baking soda remains as sodium carbonate (Na2CO3, soda). This might give a soapy bitter taste. Also, baking soda alone results in a dough in the basic pH range (opposite of acidic). In short, higher pH promotes Maillard reactions, resulting in darker cookies and more pronounced baking/caramel/nutty flavour. Also higher pH retards gluten formation, resulting in shorter texture (or more correctly, low pH promotes gluten formation).

Hartshorn liberates CO2 and ammonia. Ammonia is quite a basic substance, and seems to give rather marked different results compared to the rest (see below). Also, harthorn gives crisp, brittle and porous cookies. I haven't found any sources say exactly why, however (frustrating...). One reason might simply be of physical nature: cookies made with hartshorn are perforated due to bubble formation in a rather dry dough, resulting in cookies with lots of small holes.*

Results
Made "tyske skiver" (shortbread cookies) and "sirupssnipper" (variety of gingerbread cookies).


(Click for table in pdf format or here for table in html format)


Of course, there are lots of variables to take into account in addition to the ingredients; baking temperature, baking time, inhomogenous temperature in the oven, using more than one tray, craftsmanship etc. The experiments above were conducted in identical fashions as far as possible. The various versions were not baked on the same tray, however, which would have given the most comparable results.

Some rules of thumb
  • For soft cookies: use baking powder, alternatively baking soda plus and acidic ingredient
  • Extra brown/dark cookies: use (more) baking soda. Not recommended if the cookies have a mild flavour, strong flavour might/will mask the taste of sodium carbonate (soda). Hartshorn might work, but has other side effects.
  • Brittle/crisp: hartshorn
  • Short texture: avoid working dough with water. Crumble flour and butter thoroughly. Keep pH above neutral by using (or adding a little) baking soda, or use hartshorn.
Skipping the leavening agent altogether is also an alternative that should be considered.


General quantities and conversions
  • 1 ts baking powder = 1/2 ts hartshorn = 1/4 ts baking soda
  • amount of acid for 1/2 ts baking soda ↔ ca. 250 ml buttermilk or 1 ts lemon juice/vinegar
  • 1 ts baking powder ↔ 250 ml (150 g) flour

References

Belitz, Grosch & Schieberle: Food Chemistry (3. ed.). Berlin: Springer 2004.
Gardiner & Wilson: The Inquisitive Cook. New York: Henry Holt & co 1998.
McGee, H.: McGee on Food and Cooking. London: Hodder and Stoughton 2004.
O’Corriher, S.: Cookwise. New York: William Morrow 1997.
Olver, L.: The Food Timeline


* Harold McGee has an interesting entry on hartshorn, however erraneously stating that ammonium bicarbonate does not release water. Indeed, it does as seen from the reaction scheme below. I gues, the main point is that hartshorn does not require water to funtion, allowing for rather dry doughs (flour - sugar - butter).

6 Nov 2008

Non-stick chewing gum

A great article in the last issue of Science in School: "Easily removable chewing gum". Secondly: is there a culinary potential in restaurant/home-made chewing gum?

The article by Halina Stanley in the last issue of the Science in school (free journal) is fun reading, describing why gum sticks and also referring to recent research at Bristol University (UK) on making non-stick chewing gum.

Taking this one step further, it came to me that I've never been served home-made chewing gum at any restaurant. Wouldn't this be an interesting as palate-cleanser, say as an alternative to sorbets, granitas etc.? I googled "make your own chewing gum" and came up with loads of hits. Some of these were ready-made kits (going at $10-20), but even more interesting were some of the more general recipes that allow for leeway in flavour addition. However, I guess a ready-made kit might be a good starting point. It seems that the most commonly available products are based on natural gum (chicle), whereas most commercial brands nowadays use synthetic polymer mixtures to achieve the ideal properties, more on this in the Science in school- article.

Teaching potential
I suppose there are numerous possibilities in teaching polymer chemistry using chewing gum, testing various properties etc. A number of relevant links in the article for experiments and activities.

I'd really like some gum base for Christmas present this year :)

Erik

PS: Science in school is highly recommended reading in general, not only for teachers. On top of all, it's free
:)

12 Mar 2007

Does "light" really mean light?

In a simple demonstration playing around with light products floating/sinking in water a fascinating contrast emerges.

Try submerging the following two pairs of products: ordinary and light mayonnaise, and diet coke (or other cola vs. cola light).

Light mayonnaise floats lower than ordinary mayonnaise. In the case of the soft drink, cola light floats while ordinary cola sinks! What's going on?


Explanation
The term in question is density:

Mayonnaise
The main ingredients in mayonnaise are water and fat/oil:
Ordinary mayo: 80% fat, 16% water
Light mayo: 40% fat, 50% water

Fat floats in water. A larger proportion of fat makes the mixture closer to pure fat and vice versa.


Cola
Cola can be considered as water with some dissolved material. Ordinary cola is, as such, a sugar solution with a few other additives (taste, aroma, colour etc.).

Cola light contains the artificial sweeteners Sucralose and Acesulfame K. Both are far sweeter than table sugar, sucrose (650 times and 180-200 times, respectively, ref. Belitz). Thus, far less sweetener is needed. If we assume that all other ingredients are the same, then far less material is dissolved in the light version. The same total volume with less material --> lower density. Thus: pure cola light would float up in ordinary cola taken that they didn't mix.


In both the mayo and cola cases, there is some air (or trapped gas) inside the tube/can. This makes the tube/can float higher than in the case of the pure mayo/cola. However, as long as the volumes are the same, this doesn't make any difference. If it wasn't for the air, both cans would in fact sink, and the experiment wouldn't be.


A question of using and understanding scientific concepts
The concepts relevant to this is not only "light", but also (amongst others) "(chemical/dietary) energy" and "density". If something floats, we usually say that it's "lighter than water". However, two kilograms of wood is heavier than one kilogram of water, but it still floats. To me as an adult, it's probably easy to grasp, but placing this in an educational context makes it important to use the correct terms. So, "cola has higher density than cola light" would be more correct.

It's quite easy to put this to the test: measure both the volume and weight of a can/bottle of cola and compare. The one that sinks (highest density) weighs the most taken the same volume. Another version of this experiment is concealing the labels, letting the students know the content without telling which is which. The task is then to use knowledge and reasoning to deduce which is which.

Using the term "diet" rather than "light" would of course make the whole case less diffuse, but then a fascinating aspect in the experiment and following discussion is lost. This is the reason for using "light" instead of "diet" in the first hand. However, this may be a nice way of introducing the energy concept of (chemical) energy, kcal and kJ, and contrast this against "light" used in different contexts.


Natural sciences are evidently not only concerned with nature itself, but just as much the language describing nature.

Erik


Refs.:
- Belitz et al., Food Chemistry 3rd ed., Springer 2004
- A Swedish version of the cola experiment at SkolKemi pages of University of Umeå

4 Feb 2007

Do we need to know about dispersions: addition

Slightly embarrassing, I forgot to include Hervé This' work on dispersions.

Hervé This has done some beautiful systematic work on dispersions which he has termed "Modelling dishes". He has several publications on this, but one of these is a paper in British Journal of Nutrition: "Modelling dishes and exploring culinary ‘precisions’: the two issues of molecular gastronomy". It's (at the moment, at least) free for download through IngentaConnect.

Although probably not suitable for the everyday school teacher (but who knows), this is great stuff for those with a more-than-average interest in science vs cooking.

Erik


Post addition, February '09: the Swedish book "Den tekniske kocken" (The Technological Chef") uses in a very consistent manner the different dispersion terms, and show graphically what sorts of dispersions are important in various foods and dishes (although the book recieved a harsh review, "worst cookbook of the year", in Matälskaren).


Reference: This, H., Brit. J. Nutr. 2005, 93, S139.

3 Feb 2007

Do we need to know about dispersions?

Most of the matter and materials that surround us aren't pure compounds or true, homogeneous solutions. If we want to give a science education that is relevant and connected to everyday life, why then is so much of the labwork we do focussed on pure substances and solutions? ...and will the home-/professional cook benefit from knowing a little about dispersions?

A look in the kitchen cupboard and fridge revealed, apart from water and air, the following pure compounds and true homogeneous solutions: sugar, salt, natron (sodium bicarbonate), some of the soft drinks, and some refined vegetable oils. All the other stuff is dispersions, i.e. more or less stable mixtures of compounds/phases that don't mix.

Dispersions and colloids
A related word is colloids, but to my knowledge the word dispersions has lately been adopted as a collective term for colloids, aerosols, foams and emulsions. A dispersion is a homogeneous mixture of two or more phases that are immiscible (won't mix). What is mixed are solids, liquids and gases. The table below gives an overview. In fact, it's quite an enlightening exercise to have a look around and try categorizing the stuff around you. Bread is a foam; cheese, most vegetables and meat are gels; milk, butter and mayonnaise are emusions, just to mention a few.


Click picture for full size version in new window. Click here for Norwegian version


Why dispersions?
In Norwegian school science books and science teacher training literature, matter is divided only into pure compounds and mixtures, see below. The problem with this is that students (and teachers) don't get a language to deal with the stuff that surrounds them. To most of us, foam is a known phenomenon, and emulsions are also known to some. However, these are secondary terms rather than the primary term dispersion.

Conclusion
The term dispersion is not mentioned in the Norwegian curriculum for primary,secondary and high school (Kunnskapsløftet, eng.: "The Knowledge Promotion"). Do I think the term dispersion should have been included in the curriculum? Maybe, maybe not. This new curriculum isn't meant to give detailed instructions to what should be taught, but to what competences the students should have inherited after a certain level. It's up to the school/teacher to fill he subjects with a content as long as the students achieve these competences.

So, if we want the kids to experience a science education related to their everyday life, rather than stuff they'll meet only in science lab, maybe we should start talking about (and playing with) dispersions.

Also, for those of us who would like to benefit from scientific knowledge when we cook, this may afford a good way of viewing ingredients and foods (i.e. previous entries on Tomato foam and Egg white foam).

Erik

Post comment:
Addition to this post in the following post "Do we need to know about dispersions: addition"

23 Mar 2006

New teacher's resource: egg white foam

New teacher's resource (Norwegian only) published on Norwegian Centre for Science in Education pages www.naturfag.no:

Å fange luft med egg - Om trollkrem, skum og proteiner
("Catching Air With Eggs - Concerning Troll's Cream, Foam and Proteins")

How much foam can you get from one egg white? Why is it so difficult to get good whipped egg white foam if a small amount of grease, soap or egg yolk is present? Playing with tasts on troll's cream (troll's cream is a traditional Norwegian dessert made of egg whites whipped with sugar and lingonberries - a light and tasteful foam).

Erik

Inspiration: Pierre Gagnaire and Hervé This (Wind Crystals)


Addition 6. Feb 2007: Gagnaire's pages are now in French only, see
Cristaux de vent.

Addition 2. Jul 2011: Finnish LUMA centre has posted Troll cream on it's experiment pages.