Showing posts with label solutions. Show all posts

3 Nov 2015

Gjør det noen forskjell om vannet er noen grader kaldere eller varmere når vi brygger kaffe?

Å brygge kaffe kan være enkelt, men det som skjer når man brygger kaffe, det er en veldig kompleks prosess hvis man bare stikker nesa dypt nok nedi.

Andre molekylær gastronomi-workshop denne høsten ble holdt 26. oktober hos kaffebrenneriet Jacu sine flotte lokaler i Ålesund. Og siden kaffebrygging i all sin enkelhet er såpass komplisert bestemte vi sammen med Anu Hopia som hadde samme workshop samtidig hos brenneriet Paulig i Helsingfors at vi skulle avgrense problemet: vi ville undersøke hvor mye vanntemperaturen gjør for smaken på kaffen som blir brygget. Det sies jo at vannet ideelt sett bør holde 91-94°C når man skal brygge. Men gjør det noen forskjell om det er kokende (100 °C) eller kaldere (noen-og-80 °C)?

Foto: Jacu
Før eksperimentet innledet Anne Birte Bjørdal Hanken fra Jacu med en sekvens om kaffe fra busk til kopp. En kaffebønne har brukt 4-6 måneder fra liten blomst, via mange menneskers harde arbeid, til den ligger i en pose på kjøkkenbenken vår. Hvordan vi behandler den de neste 4-6 minuttene avgjør hvor god kopp kaffe vi får.

Bakgrunnsstoffet denne gangen handlet om ekstraksjon; når smaks-, aroma- og fargestoffer trekkes ut av knuste kaffebønner og løser seg opp i vannet. Brent kaffe inneholder et stort antall ulike stoffer, i følge Illy (2005) mer enn 1000 ulike, som i større eller mindre grad påvirker smak, duft, farge og munnfølelse. Ulike stoffer har ulik løselighet i vann, som her (i kjemisk forstand) er løsemiddelet. De stoffene som er mest løselig i vann løses opp ved lav temperatur, til og med i kjøleskapskaldt vann, mens andre stoffer trenger varmt vann for å løses opp (tenk håndvask: fete fingre sammenlignet med om man har sølt sukkerholdig saft på dem). Det er fire faktorer som avgjør hvilken kaffe man ender opp med, og alle fire handler om ulike sider ved ekstraksjon:
  1. Tid
    • Kort tid gir liten grad av ekstraksjon, lang tid gir stor grad av ekstraksjon. Tenk: dypp en tepose i vann i ett sekund sammenlignet med om den ligger i 10 minutter
  2. Temperatur
    • Høy temperatur vil ekstrahere et bredere utvalg stoffer enn lav temperatur. Tenk: la en tepose ligge i iskaldt vann mens en annen ligger i kokende varmt vann, begge i tre minutter
  3. Kverningsgrad
    • Mer finmalt kaffe gjør at vannet kommer til større del av kaffen, grovmalt kaffe det motsatte. Tenk: brygge kokekaffe med espressomalt kaffe sammenlignet med hele bønner
  4. Dosering
    • Mengde kaffe sammenlignet med mengde vann; på hverdagsspråket "sterkere" og "svakere" kaffe

Disse fire koblet vi så til begrepet ekstraksjonsgrad:
  • Underekstrahert - ekstrahert mindre av kaffen enn ønsket. Dette kan skyldes
    • For kort kontakttid
    • For grov kverningsgrad
    • Overdosert, dvs. for mye kaffe vs. vann ("ikke nok vann til å ta seg av all kaffen")
    • Ikke varmt nok vann
Resultat: tam, svak/"tynn"/"utvannet", for syrlig kaffe, lite sødme.

  • Overekstrahert - ekstrahert flere/mer av stoffene enn ønsket. Dette kan skyldes
    • For lang kontakttid
    • For fin kverningsgrad
    • Underdosert, dvs. for lite kaffe vs. vann (hvert korn blir "sugd tomt")
    • For varmt vann (er dette mulig? Vann koker ved 100 °C. Se nedenfor)
Resultat: bitter, besk og astringent kaffe, gjerne med litt "brent" smak.


  • Passe ekstrahert - ideelt ut fra gitte kriterier, noe som bør gi en balansert kaffe når det gjelder syre, sødme og bitterhet.

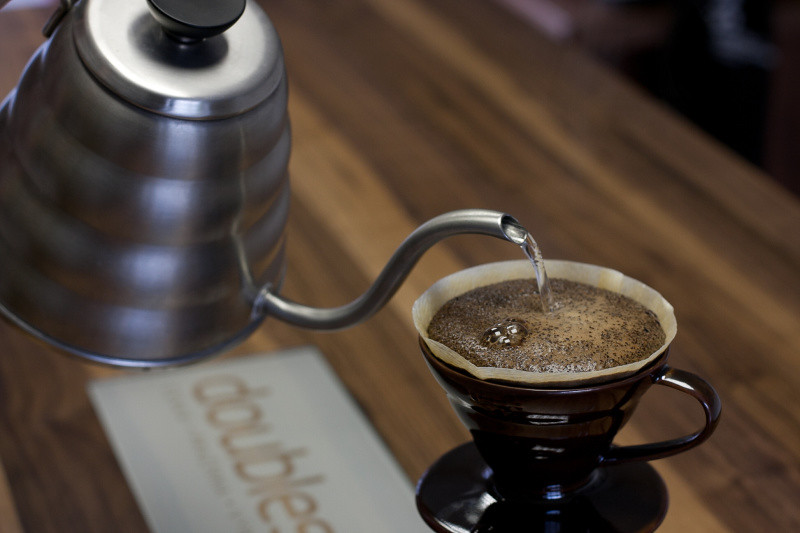
CC BY: doubleshot_cz
Måten vi brygget kaffen på var å lage filter-/dryppkaffe med
Hario v60-utstyr; en manuell variant av kaffetrakter der man heller på vannet selv. Vannet kokes opp separat, så jeg var derfor nysgjerrig på hvor raskt vannet i vannkokeren min ble avkjølt når jeg skulle helle det over kaffen: har jeg hastverk før vannet blir for kaldt, eller...? Jeg fylte 750 ml vann i vannkokeren hjemme og kokte opp med et digitalt kjøkkentermometer nedi. Når vannet hadde kokt opp startet jeg stoppeklokka og merket av tida for hver gang temperaturen sank en grad. Det viste seg at det tok mer enn 3 minutter før temperaturen var sunket til 92 °C og hele 9 minutter før den var nede i 84 °C (ikke vitenskapelig utført forsøk).

I forsøket hos Jacu brukte vi, i mikrobrenneriperspektiv, en relativt nøytral kaffe fra El Salvador: Loma Linda som er karakterisert som å ha "frisk og lett blomsterduft, god sødme og fylde", og med smakspreg av "kakao, toffee og søt lakris". Tre personer brygget parallelt, der hver hadde sin starttemperatur på vannet: 84 °C, 92 °C og nykokt vann (ca. 100 °C). De tre bryggene ble kodet A, B og C og de 18 deltakerne smakte kaffen blindt. Tilsvarende ble gjort i Helsingfors med en av Paulig sine kaffesorter.

Vi som deltok i Ålesund var ikke et øvet smakspanel; eksempelvis er det ofte vanskelig å skjelne
mellom bitter og syrlig, fruktig og syrlig osv. Likevel ser vi noen fellestrekk og noen forskjeller mellom den finske og norske prøvesmakingen, og det er både samsvar og kontrast med teorien.

  1. Den laveste temperaturen ser ut til å gi minst fyldig, mest "tam"/"utvannet", kaffe begge steder. Dette stemmer overens med teorien og er det mest markante resultatet
  2. De finske resultatene ser ut til å samsvare bedre med teorien når det gjelder bitterhet (økende bitterhet med økende temperatur)
  3. I den finske gruppa ser sødmen ut til å avta ved høyeste bryggetemperatur. Dette kan skyldes at økt bitterhet og syrlighet overdøver sødmen.
  4. Laveste temperatur gir størst fruktighet hos Jacu. Kan dette skyldes at vi som smakte forvekslet fruktighet med syrlighet?
  5. Idealtemperaturen på 92 °C ser ut til å slå til hos Paulig, mens vi som var på Jacu rangerte denne og den varmeste omtrent likt, dog klart foran den kaldeste. Dette kan også skyldes ulikheter i kaffen mellom Jacu og Paulig (jeg vil gjette at kaffen hos Jacu er lysere brent og dermed har generelt høyere syrlighet og fruktighet).
Mine refleksjoner omkring dette er

  • For utrenede deltakere å vurdere smak er krevende, og kanskje er vurderingskriteriene ikke klare nok til at vi alle tolker dem likt. Dette vil kunne komme med øvelse; i Helsingfors har mange av deltakerne vært med i flere år
  • Bryggene hos Jacu ble brygget av tre ulike personer; hver person hadde sin temperatur. Dette kan lede til systematiske feil, selv om vi to andre etter beste evne hermet etter barista Anne Birthe sin teknikk
  • Bryggeteknikken vi brukte, v60 filterkaffe, gjør at vannet raskt blir avkjølt når man begynner å brygge. Det er starttemperaturen på vannet som er målt, og desto varmere vann desto raskere avkjøles det. Altså vil vannet i de tre bryggene nærme seg hverandre i temperatur underveis i bryggingen
  • Det er en rekke aspekter ved kaffen som ikke ble vurdert, og fokus denne gangen var på smak framfor aroma. Kanskje hadde f.eks. "duftintensitet" vært relevant å ta med fordi et viktig del av kaffeopplevelsen er nettopp aroma

Avslutningsvis tok vi det ut i det ekstreme og prøvesmakte kaldbrygget kaffe. Her testet vi iskaffe laget på to ulike vis: kaffe brygget med vann på 92 °C som deretter ble avkjølt i kjøleskap (brygget av Anne Birthe samme dag), og kaffe brygget av meg med vann på 4 °C i 17-18 timer. Dette siste ble gjort i henhold til fremgangsmåte fra en annen blogg, men i stedet for presskanne brukte jeg helt enkelt ei mugge:
  1. Kaffe kvernet grovt, omtrent som for presskanne
  2. Blandet med kaldt vann i mugge; 200 g kaffe på 1600 g vann (tilsvarer 16 dl)
  3. Mugge plassert i kjøleskap og latt stå i 17-18 timer
  4. Silt og deretter filtrert (dette er vanskelig og jeg måtte filtrere flere ganger fordi filteret gikk tett)
Illustrasjon: Anu Hopia
Også her er det forskjell mellom den finske og den norske gruppa, men det mest slående er at dette er to ganske ulike drikker. I begge tilfellene er bitterheten høyest for varmbrygget kaffe, noe som samsvarer med teorien. Det andre påfallende resultatet er at begge gruppene delt på midten når det gjelder hvilken bryggemetode de foretrekker av de to.

***********************

Neste MG workshop blir 23. november ved avdeling for restaurant- og matfag ved Borgund vidaregåande skole. I Helsingfors vil tema denne gangen vil være gravlaks: har det noe å si om laksen har vært frosset, evt. om det er mulig å grave fisk i fryseren? Kanskje er dette interessant også for oss som tross alt leverer fisken som finnene bruker til sin gravlaks?

19 Oct 2015

​ Molekylær gastronomi-workshop: Velkommen til utforskende kaffesmaking hos JACU i Ålesund

(this is an invitation to an event in Norway, thus written in Norwegian)

Sted: Kaffebrenneriet JACU, Ålesund (...og parallelt i Helsingfors!)
Dag/tid: Mandag 26. oktober kl. 17-19
Hvem: Alle som vil, gratis. 
NB: kun 15 plasser (påmelding, se nedenfor)

Men hva skal vi utforske? Kaffe er jo en veldig enkel og rett fram drikk:
  1. bland litt kvernede kaffebønner med vann
  2. vent en stund, slik at smak og lukt fra kaffebønnene blir løst opp (ekstrahert) i vannet
  3. sil/filtrer bort restene av kaffebønnene
  4. og det var det, enkelt og greit...
...eller kanskje ikke? Hvis det hadde vært så enkelt, hadde ikke livet vært litt kjedelig?

Hvor kaffen kommer fra, hvordan den er dyrket og behandlet før den blir brent, og hvordan den brennes har mye å si for hvordan den kommer til å smake i koppen. En kvalitetskaffebønne har brukt et halvt år eller mer på å vokse seg moden på en kaffeplante for deretter å komme seg hjem til oss, og det skjer i flere trinn: høsting, vasking/tørking, reise, brenning, og kverning. Og mange mennesker har jobbet hardt for at den skal vise seg fra sin aller beste siden når den til slutt kommer hjem til oss. Og den som rår over "livets høst" til denne kaffebønnen, ja det er oss. Gjør det noen forskjell hvordan vi behandler kaffen de siste minuttene av dens liv?

Hva er det så ved disse siste minuttene som betyr noe for hvordan kaffen i koppen vår smaker? De som har greie på kaffe sier og skriver at det er flere faktorer som teller:
  • forholdet mellom mengde kaffe og vann ("hvor sterk" vi lager den)
  • temperaturen
  • hvor grovt eller fint kaffen er kvernet
  • hvor lenge siden den var kvernet
  • hvor lenge kaffen og vannet er i kontakt med hverandre

Foto: Siv Aurdal
Alle disse tingene påvirker hvilke stoffer, og hvor mye av hver, som blir ekstrahert ut i vannet, som ender opp som det en kjemiker ville kalt en løsning, suspensjon, emulsjon, skum, eller en kombinasjon av disse.

Og saken slutter med det! Selv om vi skulle klare å brygge kaffe som er kjemisk og fysisk identisk hver gang, vil vår glede og opplevelse av kaffen være styrt av følelsene våre, hvem du drikker den sammen med, og til og med hvilke lyder du hører mens du drikker den...

Nei, dette blir alt for komplisert! Her må det forenkles og avgrenses:

Vi starter denne workshopen med litt kaffekjemi og hvordan de viktigste sidene ved ekstraksjonen (bryggingen) påvirker innholdet i den endelige drikken. Og det handler ikke bare om den er sterk eller svak, men også bitterhet, syrlighet og ulike aromaer. Og forhåpentligvis kan deltakerne også dele sin kunnskap med oss!

Deretter smaker vi på om bryggetemperaturen betyr så mye eller ei; gjør det noen forskjell om vi brygger kaffen på "rett" temperatur og hvordan smaker kaffe som er brygget på ulike temperaturer? Er det riktig at kaffen blir best når den er brygget med vann på 91-94 °C? Hva så med den etter hvert så populære (i hvert fall i USA) "kaldbryggede" kaffen som lages over natta med romtemperert eller kjøleskapskaldt vann?

****************************
Vi møtes i JACU sine lokaler i Parkgata 18A, Ålesund, og programmet starter kl. 17. Pga. begrenset plass er det nødvendig med påmelding ved å sende meg en e-post. På forhånd takk til JACU som stiller lokaler og kaffe til rådighet!

Vi vil gjennomføre denne workshopen i Ålesund og Helsingfors på samme dag, nesten samtidig. Den finske molekylær gastronomi-klubben som har pågått i en årrekke, ledet av Anu Hopia, vil ha sin workshop i det store kaffebrenneriet Paulig sine lokaler i Helsingfors. Resultatet fra de to workshopene vil bli publisert i våre to blogger i tillegg til en engelsk versjon i Kitchen stories-nettverket sin Facebook-gruppe.

24 Jun 2011

Norwegian Barista Championships 2011. Part 2b - seminar on coffee defects

In this third post from this spring's Norwegian Barista Championships I summarise the most interesting seminar I attended. It was hosted by former world champion barista Tim Wendelboe and focussed on tasting defects in coffee.

I attended two seminars by Tim Wendelboe during this year's event, and of the two the one mentioned here was definitely the most rewarding for me personally.

WORKSHOP/SEMINAR: Flavour defects in coffee
(by Tim Wendelboe)
I always tell my students that if a recipe warn them not to do this or that, they should deliberately try doing it at least once (e.g. don't get egg yolk in the egg whites when whipping meringue, don't open the oven when baking sponge cake etc.). If you don't know how things look or taste when they're failed, it's difficult to have any reference for what's successful. So, go ahead - be disobedient! Tim had indeed done so and collected coffees with various defects in which he brewed cups of defective coffee. The cups were brewed as he would have brewed any other coffee; to the best of one's ability. Not only so, he had also done his best effort to single out the various defects so that we could taste each type of defect separately. Elegant, interesting and very enlightening. The defects we got to taste were:

Faded coffee
(this paragraph has been re-written subsequent to a comment)
at least two reasons for this. The first is past crop vs. new crop. Past crop = coffee that has been stored for some while (e.g. last season's crop) before roasting and sale. This is a typical problem if you are served, say, a Costa Rica coffee this summer because the harvest season is August-December. The second reason for fading is a processing defect if temperature has been too high during drying (e.g. using closed greenhouse-like drying houses with too little airflow). The characteristic of faded coffee is on my palate more subtle and not that critical a defect, but results in lower fruitiness and more woody flavour. The acidity might still be there, but the fruit is more or less gone. So if you get a bag of great Kenya or Panama coffee out of season, don't be surprised if you can't taste all they claim it does on the description on the bag. Also, this defect is easy to get your hands on, even among speciality dealers. Get your hands on a bag of Indian Monsooned Malabar or some Old Brown Java Coffee from Indonesia. These coffees are deliberately aged at the green bean stage to develop a flavour which one would consider being a defect in most other coffee.

Unripe beans
many inexpensive coffees are being uncritically strip picked resulting in a mixture of overripe, unripe and ripe beans; everything is picked at the same time and nothing is thrown away. Characteristic defect flavour would be peanut, old nuts and unpleasant acidity. I would add that unripes also would give a pea-like or grass-like flavour (picture by courtesy of www.coffeeresearch.org).


29 Jul 2010

"Anyone for aN 'espresso?" - Machine made coffee seen through transparent glass

A short summer reflection: I've never thought about looking through a cup of espresso, or lungo, or americano, until this holiday. To my surprise the lungo is not always homogeneous (it shouldn't have been, however).

At the house we are exchanging for this summer, in the middle of Paris :), there is a Nespresso machine. At home, we have an rather ordinary/mainstream espresso machine, whereas Nespresso claims to give you a good cup of espresso or lungo without all the hassle: insert one of the many varieties of ready made coffe capsules, press the button, and you get a good(?) cup of espresso without the need for grinding, cleaning etc.


26 May 2009

Chocolate part 3:3 - making your own instant cocoa

During graduate studies, we often wished for a "journal of unsuccessful chemistry" for the benefit of all the failed experiments we do. What if there was a journal where we could look for the experiments we were planning, and see if someone else had tried it and failed? This is one of those stories.

Cocoa powder has this property that it is hardly wetted by water. The result is
  • when making cocoa, thorough agitation or stirring is necessary to avoid lumps and cocoa powder floating on top
  • eating plain cocoa powder is not a very pleasant experience
In my search for info on why chocolate seizes (chocolate part 1:3) and shaping chocolate (chocolate part 2:3), I came over three papers on the wetting properties of cocoa and cocoa granules. In short, they stated that if I could turn cocoa powder into a granulate rather than the fine powder it is, it might disperse more easily because it'll interact better with the water molecules. Also, I figured, it might taste better in it's dry state as it's easily wetted by the saliva in my mouth.

Would it be possible for me to make my own instant cocoa, or maybe some palatable cocoa powder for sprinkling on top of dishes? If so, I could make my own blend and use quality cocoa rather than the sugar-loaded mixtures that are sold in grocery shops.

Granulating cocoa powder
Omobuwajo et al. brought about an easy method of making granules that are readily wetted by water. They simply heated the cocoa powder on metal plates. No need for expensive industrial machinery and additives. They investigated the granulation related to various cocoa-to-sugar ratios and conclude that the two best instant cocoa mixes were made by rapid heating of sugar and cocoa in 3:1 and 4:1 ratios, using fine sugar (0.23 mm), giving granules of 0.18 mm size. Now, if heated metal plate = skillet on my stovetop, I might make my own instant cocoa powder, or...?

A mixture of 9 g plain cocoa powder and 27 g sugar was heated in a pan on medium high heat (a little below maximum) with continuous stirring for 5 minutes.

Result: yes, the cocoa is granulated (right). No, I was not able to make granules that disperse more easily in a reproducible manner (some times it was easily wetted, sometimes it wasn't). Also, the powder tasted somewhat different due to the heat treatment (surprise...), without being more palatable than pure cocoa powder mixed with sugar.

Conclusion: more testing is necessary, several parameters to vary (temperature, time, stirring). This might probably work, but I don't find this interesting enough to spend more time on experimenting.


Wetting properties of cocoa powder
Wetting by water is closely related to whether something is hydrophilic or hydrophobic. If it's hydrophilic, it loves water and wetting occurs easily; water spreads out on the surface. If it's hydrophobic, the opposite occurs, such as on Gore-Tex. Wetting is not limited to water, and other solvents also possess wetting properties. These properties are in turn closely related to the surface energy. A general rule is that media/material with similar surface energies will possess similar wetting properties.

Galet et al. reported that the surface energy of cocoa powder is considerably lower than surface tension of water. Result: water and cocoa powder don't mix very well (surprise...). The bad dispersion behaviour of cocoa is caused by a number of phenomena, and one is the hydrophobic nature of cocoa, the fat content being 10–12% in cocoa powder. The mean particle size of cocoa is commonly around 16 micrometres (0.016 mm), but the size distribution is wide. The smaller the grains, the more difficult is the dispersion. Granulating the powder (making grains of 0.02 mm - 2 mm) resulted in enhanced wetting properties.

Partly, the bad dispersion properties is because of the bad flowability and the cohesive forces of the powder. The cohesion results in solid agglomerates, and the shear forces are not sufficient to break the cohesive forces between the grains. In plain words: cocoa powder lumps up in water, simply floating on top (another surprise...).

Cocoa powder in alcohol
A conclusion that may be drawn by this, is that liquids with lower surface tension (surface energy) than water might wet cocoa more easily. Galet concludes that liquids with lower surface energies than 40 mN/m will wet the cocoa powder, and that less than 15 mN/m will give perfect wetting. Water has surface energy 72 mN/m, not to wonder why cocoa powder and water doesn't mix well. However, alcohol (ethanol) has surface energy 22 mN/m, and a 40% ethanol in water mixture has surface energy 41 mN/m.


Conclusion: making cocoa flavoured alcoholic drinks should be easier than water-based ones.


References
Galet et al. "Improving the Dispersion Kinetics of a Cocoa Powder by Size Enlargement". Powder Tech. 2003, 130, 400-406.

Galet et al. "The Wetting Behaviour and Dispersion Rate of Cocoa Powder in Water". Food Bioprod. Proc. 2004, 82, 298-303.

Omobuwajo et al. "Thermal Agglomeration of Chocolate Drink Powder". J. Food. Eng. 2000, 46, 73-81.

On chocolate for education purposes:
http://www.exploratorium.edu/chocolate

http://expertvoices.nsdl.org/connectingnews/2009/02/04/the-science-of-chocolate-just-in-time-for-valentines-day

15 Mar 2009

Chocolate part 1:3 - why it seizes with just a little water, ...and what to do about it

Revised June 2nd 2015 

(Important: See the last set of comments for a critique which possibly requires some major revision to the text and figures).

If just a little amount of water finds its way into melting chocolate, it goes all grainy and solid - it seizes/curdles. There is really no fix to the problem. However, if some more water is added, the chocolate suddenly becomes fluid again. How come?

In three recent posts in the Swedish food blog Matmolekyler ("Food molecules"), Malin discusses the physics of chocolate. In the third one, the question arose on what really happens when a little water makes the chocolate go all grainy, and why adding some more water solves the problem. It made me start looking around in my "standard" food literature base: Corriher, McGee, Belitz/Grosch/Shieberle, Barham, Pedersen, Dahlgren. Although Corriher came closest, none of them had the answer to Malin's question: "is there an oil-in-water emulsion going on or something?". Finally, Beckett did have the answer, maybe not very surprising, since the name of the book is "The Science of Chocolate". However, it took some serious searching even in this book in addition to a few research papers. Hence, I expect to write a couple of more posts on chocolate since I've dug into the topic.

Chocolate seems like no easy medium to work with, and according to books on the topic I have to follow loads of specific directions in order to avoid failing. I've postponed it in fear of failing. The solution to the problem: start by failing on purpose!

The problem
It all starts when trying to melt the chocolate. (Cook)books say:
  1. the chocolate should be carved or cut into small pieces
  2. use low heat, preferably a water bath or double boiler , stirring continuously
  3. don't ever get water in the chocolate (either from the water bath or from moist equipment)
  4. (microwave oven might be used as an alternative, although carefully)

I have an inherent need of doing things as easy as possible, and using the double boiler method makes me go nuts waiting for the last bits to melt. To me, water bath equals splashing warm tap water around in the kitchen sink. In that respect, points 2-3 pose a problem, because getting water in the chocolate results in this:

Left: 100 g melted pure (55%) chocolate
Right: the same melted chocolate after adding less than a teaspoon of water

In fact, so little water is needed for this to happen that steam from a boiling pan might be enough to make the chocolate go grainy. When this happens, there is no way back to the pure chocolate. However, it is perfectly usable for other purposes such as chocolate sauce, ganache, drinking cocoa etc. Alternatives to using water bath or a double boiler principle. In stead of water bath or double boiler, I usually use the microwave or even melt the chocolate directly in the pot using low heat and stirring continuously (have to be very careful). However, I love sabotage experiments. When recipes tell me by all means not to do something, the little boy awakens and I go for it. And that's the point in this post: what happens when chocolate seizes?

To understand what happens one need to know what chocolate is...

Basically, chocolate is
  • cocoa fat (cocoa butter) - water repelling
  • sugar particles - water loving
  • cocoa particles - somewhat unclear*
  • lecithin emulsifier - water repelling and water loving
  • (for milk chocolate: milk fat and/or milk powder)
Chocolate is a dispersion, consisting of solids distributed in a fatty (continuous) phase. It contains miniscule cocoa particles (mean diameter ca. 0.016 mm) and sugar particles too small for our tongue to notice them as grainy when properly distributed. The sugar is hydrophilic (water loving), and repelled by the fat. An important function of the lecithin emulsifier is to build protecting layers around the sugar particles so that they don't separate from the fatty phase and give a grainy texture. The emulsifier is commonly lecithin (lecithin is also a natural constituent of egg yolk, and the main reason for why the yolk doesn't split into a fatty and a watery phase).

Schematic drawing of the above photos
Left: pure chocolate. Right: chocolate after adding just a little water

What happens when water gets into the chocolate?
In it's solid form, pure chocolate is a relatively stable system virtually free of water (0.5-1.5% by weight). When the chocolate is melted, the stable dispersion is challenged. If just a small amount of water (or steam) finds its way into the chocolate, the water molecules form droplets, since they don't want to mingle with the fat. Since water and sugar like to mingle, the sugar particles are wetted by the water. The result is "the sugar bowl effect", just as when a few drops of water are spilled into a sugar bowl. The tiny sugar particles in the chocolate become moist and cling together giving larger lumps (agglomerates). The result is an inhomogeneous mixture between these sugar agglomerates and the cocoa fat mixture. These won't mix evenly because the sugar has gone watery (the lecithin is probably not capable of stabilising such large amounts of hydrophilic constituents). Since sugar is a major ingredient in chocolate, it all goes grainy. A water content of 3-4% by weight is enough to make the chocolate seize. Since the chocolate might contain som water already the critical amount of added water might be as low as 1.5% by weight (1/3 teaspoon on 100 g, ref. Afoakwa et al.).

Add some more water, and everything is "fine" again
If the chocolate has seized, there is really no way back to the original chocolate. However, if some more water is added, the grainy mass magically turns silky smooth again. What happens is that the emulsion inverts; whereas fat was the continuous phase in chocolate, now water is the continuous phase and the fat is distributed/"dissolved" in the water:
Left: 100 g melted pure (55%) chocolate, seized with less than a teaspoon water
Right: the same chocolate after a tablespoon of water

A definite explanation of this was in fact rather difficult to find, and the only literature source stating this explicitly was in fact Beckett's book (The Science of Chocolate. Afoakwe also states this, but refers to Beckett's book). He writes that about 20% by weight water vs. chocolate is needed to achieve such a phase inversion, whereas Corriher writes that you need a minimum of 1 tablespoon water per 56 g (2 oz) chocolate. This roughly equals 30% 20% by weight. Note that this is total amount of water; if cream, butter or some other water-containing ingredient is used, this contribution counts.

Schematic drawing of the above photos
Left: seized chocolate. Right: after adding a tablespoon of water

Since chocolate contain plenty of emulsifiers, this emulsion might be quite stable and a good starting point to many wondrous things such as drinking cocoa, chocolate sauce, ganache/truffles, foam/mousse ("chocolate chantilly") or even a chocolate mayonnaise.

What might be taught/learned
  • dispersions: emulsions and solid dispersions
  • solutions/solubility, hydrophilic and hydrophobic properties
  • experimental and cooking skills (dealing with chocolate)
  • observational skills (what to look for in an experiment)


*Note: Some sources (Rowat et al., 2011, and these ppt slides by Naveen Sinha) state that the cocoa particles are hydrophilic (water loving) and that the emulsifier surrounds these rather than (or just as much) as the sugar particles. I have not been able to confirm this and have thus drawn it as neither water loving or water repelling. However, I've found a couple of papers stating that the cocoa particles in fact contain fat (points towards water repelling, see Do et al., 2011) and that the emulsifier primarily attaches itself to the sugar particles (Vernier cited in Svanberg et al., 2011).


References, scientific papers

Afoakwa, Paterson & Fowler: "Factors influencing rheological and textural qualities in chocolate - a review". Trends Food Sci. Tech., 2007, 290-298.
Do, Vieira, Hargreaves, Mitchell & Wolf: "Structural characteristics of cocoa particles and their effect on the viscosity of reduced fat chocolate". LWT - Food Sci. Tech., 2011, 44, 1207-1211.
Rowat, Hollar, Stone & Rosenberg: "The Science of Chocolate: Interactive Activities on Phase Transitions, Emulsification, and Nucleation". J. Chem. Ed.201188, 29-33
Svanberg, Ahrné, Lorén & Windhab: "Effect of sugar, cocoa particles and lecithin on cocoa butter crystallisation in seeded and non-seeded chocolate model systems". J. Food Eng.2011104, 70-80.

References, books with relevant information on the subject

Beckett: The Science of Chocolate (1. ed.). Cambridge : Royal Society of Chemistry 2000.
Belitz, Grosch & Schieberle: Food Chemistry (3. ed.). Berlin: Springer 2004.
Dahlgren, Ö.: Laga mat - hur man gör och varför. Stockholm : Liber utbildning, 1994.
McGee, H.: McGee on Food and Cooking. London: Hodder and Stoughton 2004.
Corriher, S.: Cookwise. New York: William Morrow 1997.
Pedersen, T.: Kemien bag gastronomien. Copenhagen: Nyt Nordisk Forlag 2005.

16 Mar 2007

Does "light" really mean light? - part II

A follow-up on the last entry, comments and Brian's Diet Coke Floating blog entry

The comments on the last entry on Coke density spurred my curiosity, and I decided to follow up with a few experiments:
  1. What's the density of different kinds of Coke? I did a simple experiments, weighing measured amounts of Coke (ca. 100 ml) and got the following result. I did the same measurement for water and corrected this according to standard water density values from a web based water density calculator:


  2. What about water density as function of temperature? The density changes according to the reference values are small, far too small to make a difference (my cans/bottles held between 13 and 21 deg. C), as seen from the density curve as function of temperature (the same density calculator used):

    And, of course, the density-temperature difference should not be very different from water to Coke, so at temperatures of high water density, the same should apply to Coke.

  3. Experiments should always be tested for repeatability, so I used two cans of coke. Also, I tested whether the same would happen for Coke bottles (500 ml plastic bottles), and if the same would happen for Coke Zero. The pictures below tell the whole story. The difference between Coke Light and Coke Zero, from the ingredients list, seems to be the sweeteners. Coke Light contains Sucralose and Acesulfame K, while Coke Zero contains Aspartame and Acesulfame K.

What seems really strange to me is the measurement of Coke light and Coke Zero having densities lower than water, especially the light variety which is well below any temperature dependent variations. How can it be that a water solution with dissolved matter has lower density than water? Carbon dioxide? I don't think so. Carbon dioxide is still matter dissolved in water and should contribute to a higher density rather than lower (regardless of its density in pure, gaseous form).

Anyway, the safe explanation to the floating Coke light is of course the air pocket (both in cans and bottles), and I think I'll stick to this as the main explanation rather than densities of Coke. Ordinary Coke is a clean cut case, anyway.

Erik

12 Mar 2007

Does "light" really mean light?

In a simple demonstration playing around with light products floating/sinking in water a fascinating contrast emerges.

Try submerging the following two pairs of products: ordinary and light mayonnaise, and diet coke (or other cola vs. cola light).

Light mayonnaise floats lower than ordinary mayonnaise. In the case of the soft drink, cola light floats while ordinary cola sinks! What's going on?


Explanation
The term in question is density:

Mayonnaise
The main ingredients in mayonnaise are water and fat/oil:
Ordinary mayo: 80% fat, 16% water
Light mayo: 40% fat, 50% water

Fat floats in water. A larger proportion of fat makes the mixture closer to pure fat and vice versa.


Cola
Cola can be considered as water with some dissolved material. Ordinary cola is, as such, a sugar solution with a few other additives (taste, aroma, colour etc.).

Cola light contains the artificial sweeteners Sucralose and Acesulfame K. Both are far sweeter than table sugar, sucrose (650 times and 180-200 times, respectively, ref. Belitz). Thus, far less sweetener is needed. If we assume that all other ingredients are the same, then far less material is dissolved in the light version. The same total volume with less material --> lower density. Thus: pure cola light would float up in ordinary cola taken that they didn't mix.


In both the mayo and cola cases, there is some air (or trapped gas) inside the tube/can. This makes the tube/can float higher than in the case of the pure mayo/cola. However, as long as the volumes are the same, this doesn't make any difference. If it wasn't for the air, both cans would in fact sink, and the experiment wouldn't be.


A question of using and understanding scientific concepts
The concepts relevant to this is not only "light", but also (amongst others) "(chemical/dietary) energy" and "density". If something floats, we usually say that it's "lighter than water". However, two kilograms of wood is heavier than one kilogram of water, but it still floats. To me as an adult, it's probably easy to grasp, but placing this in an educational context makes it important to use the correct terms. So, "cola has higher density than cola light" would be more correct.

It's quite easy to put this to the test: measure both the volume and weight of a can/bottle of cola and compare. The one that sinks (highest density) weighs the most taken the same volume. Another version of this experiment is concealing the labels, letting the students know the content without telling which is which. The task is then to use knowledge and reasoning to deduce which is which.

Using the term "diet" rather than "light" would of course make the whole case less diffuse, but then a fascinating aspect in the experiment and following discussion is lost. This is the reason for using "light" instead of "diet" in the first hand. However, this may be a nice way of introducing the energy concept of (chemical) energy, kcal and kJ, and contrast this against "light" used in different contexts.


Natural sciences are evidently not only concerned with nature itself, but just as much the language describing nature.

Erik


Refs.:
- Belitz et al., Food Chemistry 3rd ed., Springer 2004
- A Swedish version of the cola experiment at SkolKemi pages of University of Umeå