Showing posts with label enzyme. Show all posts

6 Dec 2015

​ Gravlaks av fersk eller frossen fisk, eller kanskje "frysegravet" laks?


I Borgund vidaregåande skole sitt flotte demonstrasjonskjøkken/-auditorium
Vi startet workshopen i november hos restaurant og matfag ved Borgund vidaregåande skole med forskjellen på gravlaks og rakfisk, to produkter som mange synes å forveksle med hverandre. Mens rakfisk er et fermentert produkt som trenger 2-4 måneder på å bli ferdig og holder seg i ytterligere flere måneder, lages gravlaks (eller andre gravede matvarer) på noen få dager og er å regne som nærmest ferskvare. Og mens rakfisken går gjennom en melkesyrefermentering og modning på mange måter nært beslektet med lagrede oster, opplever gravlaksen bare de første dagene av dette før den blir spist opp.

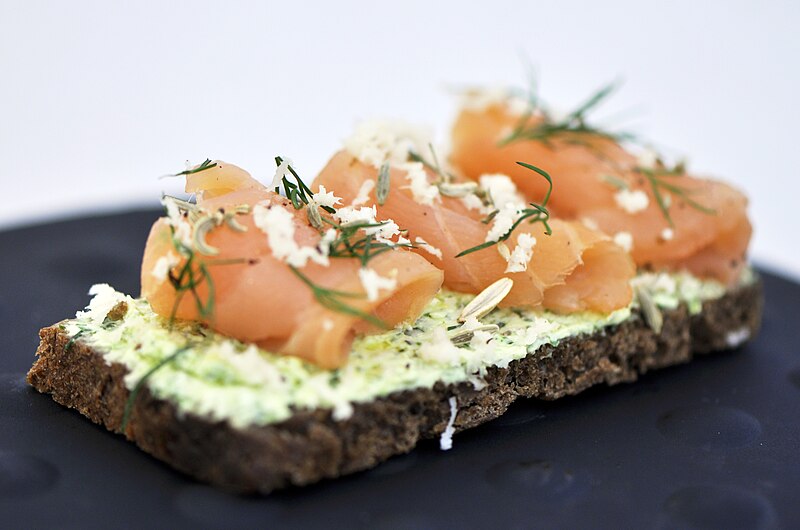
Skjematisk oppskrift på gravlaks:

  • Strø en blanding av salt, sukker og dill over kjøttsiden av en fersk laksefilet (med skinn)
  • Pakk den tett og sett den i kjøleskap to dager eller mer, avhengig av tykkelsen på fileten og hvor mye man vil ha den gravet
  • Skjær tynne skiver og server med brød og sennepssaus

Frysing og graving

Våre finske venner hadde kommet over en framgangsmåte som etter sigende skulle være veldig praktisk: strø en laksefilet med salt/sukker-blanding og legg den i fryseren. Dagen før du skal spise den kan du ta den ut av fryseren og den vil graves mens den tiner. 

Når jeg skulle kjøpe fersk laks i en velassortert matvareforretning sa fagmannen at jeg måtte fryse, og tine, den før jeg skulle grave den. Jeg ba ikke om noen begrunnelse, men pålitelige kilder bekrefter at dette gjøres for å drepe eventuelle parasitter i villaks, noe som ikke er noe problem med oppdrettslaks (nok en faktor å ta med i debatten om villaks vs. oppdrettslaks). Dermed har vi to måter å kombinere frysing og graving:


Forsøket

Med utgangspunkt i en oppskrift fra godfisk.no ble det laget tre nedstrippede versjoner av gravlaks med kun salt og sukker, uten dill eller annen smakstilsetning for lettest å kjenne forskjell på de tre og samtidig minimalisere feilkilder:

  1. "Frysegravet". Laksefilet strødd med salt/sukker, pakket inn i plast og lagt i fryseren i tre døgn. Tatt opp to døgn før smaking
  2. Frosset - tint - gravet. Frosset tre døgn, tint opp og deretter gravet i to døgn
  3. Fersk gravet. Gravet i to døgn fra fersk tilstand
Dette måtte nødvendigvis være to ulike fisker, så de to første var fra en filet mens den tredje var en annen. Men vi var heldig å få fisk som var nøyaktig like gamle (oppdrettsfisk kjøpt to døgn etter at de var slaktet). Filetene ble veid før og etter graving og alle tre hadde et vekttap på 4-5 %.

Prøvesmakingen

Vi laget i stand en blindsmaking der vi vurderte de tre etter kriteriene saltsmak, sødme, friskhet (lite smak av "gammel fisk"), mørhet og hvilken som var foretrukket. Hver deltaker rangerte dem ved å fordele 1, 2 og 3 poeng i de ulike kategoriene. F.eks. ga man for karakteristikken saltsmak 3 poeng til den som opplevdes mest salt, 1 poeng til den som opplevdes minst salt og 2 poeng til den imellom. Slik fikk hver prøve en poengsum som representerte den gitte egenskapen. 

Vi kan nok anta at laksen i Ålesund er ferskere enn den som var kjøpt i Helsingfors da denne også var norsk men måtte oppleve transportetappen fra Norge til Finland.

Resultat og diskusjon

Det første og tydeligste resultatet fra radardiagrammet er at de tre ble ulike; de tre metodene gir altså ikke samme resultat. De to som ble frosset var endog fra samme fisk. Opplevd saftighet var markant høyere for de som var frosset; kanskje kan dette skyldes at disse to har sluppet noe vann ut i vevet, mens væsken i den ferske fremdeles var bundet i muskelmassen? De tre hadde jo tapt omtrent like mye væske (en mulig feilkilde er at den ferske laksen i utgangspunktet var tørrere enn de frosne, men dette er vel lite sannsynlig?). Det er jo velkjent at kjøtt slipper væske når det fryser fordi vannet utvider seg og dels sprenger cellene (tenk på frosne jordbær som en ekstremutgave av dette fenomenet).

Flere av resultatene er ulike i Helsingfors og Ålesund. Dette kan skyldes flere ulike ting, deriblant tilberedningsmåte, fisken, kjøleskapstemperatur og at vi var to ulike smakspaneler. Begge steder var filetene gravet relativt kort tid, 1-2 døgn og i Helsingfors var ikke den frysegravede tatt ut før samme morgen som den ble smakt (i henhold til oppskrift, mens vi ga den lengre tid. 

Kjøleskapet som ble brukt til å grave laks til Ålesund var relativt kaldt, ca. 2 grader C. Lavere temperatur bør gi langsommere gravingsprosess. En deltaker foreslo at vi i stedet for å angi antall dager graving bør gjøre som når man modner kjøtt; anbefale et antall døgngrader (2 døgn ved 4 grader = 8 døgngrader). Imidlertid vil gravingen også bestemmes av tykkelsen på fileten samt hvorvidt man bruker grovt eller fint salt. Og i Finland sies det at man bør bruke grovsalt for at det tynne laget med saltlake som danner seg på overflaten ikke skal bli for konsentrert, tørke ut overflaten på kjøttet og dermed gi en "tørr" skorpe som bremser videre graving. Men kanskje er dette viktigere for oppskrifter der man bruker større andel salt enn sukker, slik som den finske (og den norske?), enn den svenske der andel sukker er høyere? Vår svenske deltaker i Ålesund kunne nemlig informere oss om at den oppskriften vi brukte heller kunne omtales som speking enn graving på grunn av den store andelen salt sammenlignet med sukker; i hvert fall hvis vi hadde vært i Sverige.

Men til tross for relativt ulike spesifikke smaksvurderinger (salt, sødme osv.) ser vi av søylediagrammet at det mest foretrukne i både Helsingfors og Ålesund er den ferske laksen, mens den frysegravede er minst foretrukket. Så kanskje kan vi si at man bør ha betydelig praktisk fordel av å frysegrave framfor å tilberede den fersk? Og videre kan kanskje dette sees som et ørlite slag for oppdrettslaks sammenlignet med villaks da regelen sier at villaks må/bør fryses mens dette ikke er nødvendig for oppdrettslaks. Men skal vi kunne si noe definitivt om dette vil vi måtte gjøre et nytt forsøk der vi sammenlignet disse to.

15 Nov 2015

Molekylær gastronomi-workshop 23. november: Lage gravlaks i fryseren?

Foto: Wikimedia/Schefferbird
Det er mulig å fryse gravlaks hvis du har mer enn du trenger i øyeblikket. Men nå hevder noen at man kan lage gravlaks i fryseren. Stemmer det? Og hvordan blir i så fall denne sammenlignet med laks gravet på vanlig måte?

Her til lands lages gravlaks vanligvis ved at man strør en blanding av salt, sukker og dill på filet av fersk laks, dekker det til og lar det ligge i kjøleskap 1-4 døgn avhengig av tykkelsen på fileten (det finnes selvsagt ulike varianter av krydderblandingen/marinaden).

På en finsk nettside om laks hevdes det imidlertid at man kan lage gravlaks ved å fryse ned fileten med salt, og så blir den gravet mens man tiner den i kjøleskap (i Finland graves laksen med bare salt og dill, uten sukker). Man kan altså lage den på forhånd, la den ligge i fryseren inntil tre måneder, og plukke fram opp etter behov.

 Foto: Wikimedia/Miia Ranta 
Men kan det være andre grunner til å lage slik "frossegravet" laks? Den finske kokken og yrkesfaglæreren Tatu Lehtovaara har smakt dette og mener å huske at konsistensen blir ganske annerledes. Men hva skyldes dette? Ville vi fått det samme resultatet om vi hadde tint en frossen laksefilet og deretter gravet den?

Og følgelig har vi tre ulike varianter vi kan prøvesmake før julebordsesongen slår inn over oss for fullt. Hva er forskjellen i struktur og konsistens, sødme, saltsmak og munnfølelse? Eller blir de kanskje ikke så ulike? Og hvilken vil vi foretrekke?


======================================
Tid: Mandag 23. november kl. 17-19
Sted: Borgund vidaregåande skole, Avdeling for restaurant og matfag, Yrkesskolevegen 20
Påmelding: Meld deg på med e-post til ef(at)hivolda.no. Da får du beskjed ved eventuelle endringer
Som alltid, gratis å delta.

Vel møtt!

4 Sept 2012

Facts about miracle fruit (miraculin revisited - part 2:2)

Short introduction in Norwegian: I anledning at jeg deltok i en episode om mirakelfrukt på Schrödingers katt på NRK (og YouTube) publiserer jeg to blogginnlegg om temaet. Det første innlegget handler om smakstesting av mirakelfrukt. Innlegget nedenfor er del 2 av 2 og er en samling fakta om mirakelfrukt med referanser til forskningslitteratur. Siden denne bloggen normalt er på engelsk fortsetter jeg herved på engelsk.

On the occasion of me attending an episode of the Norwegian popsci TV series "Schrödingers katt" (and YouTube) about miracle fruit I post two entries on miracle fruit and its key constituent miraculin. The first post describes a tasting of miracle fruit with a number of sour foods. The second post below is a collection of facts about miracle fruit based on research literature. Part 2:2 below is divided into the following main topics:

20 Oct 2011

Miraculin revisited - part 1:2

Introduction in Norwegian: I anledning denne ukas episode om mirakelfrukt på Schrödingers katt på NRK (og YouTube) publiserer jeg to blogginnlegg om temaet. Det første er en reprise av et tidligere innlegg, dog utvidet med noen flere smakstester. Det påfølgende er en samling fakta om mirakelfrukt med referanser til primærlitteraturen. Siden denne bloggen normalt er på engelsk fortsetter jeg herved på engelsk. Innlegg nr. 1 av 2 følger nedenfor.

On the occasion of me attending this week's episode of the Norwegian popsci TV series "Schrödingers katt" (and YouTube) about miracle fruit I'll post two entries on miracle fruit/miraculin. The first is a reposting on a previous entry, expanded with a few more tasting notes. The second post will be a collection of facts about miracle fruit including references to primary literature. Part 1:2 follows below.

The following entry was previously published 7 August 2010, slightly revised.
Note: the original blog entry has some interesting comments worth having a look at.


For some time now, there has been somewhat of a hype about the miraculous berry that makes everything sour taste sweet. Some time ago, I ordered a packet of dried and powdered miracle fruit tablets and gave it a try. The following post gives some background and the results of a truly fascinating experience.

The miracle fruit is a a berry containing the glycoprotein miraculin with the unlikely effect that when your taste buds meet this substance, you taste sour foods as they were sweet. That is, your perception of sourness is altered. In certain parts of the world, the substance has been used for quite long, whereas in USA and Europe it has not yet been cleared for use as additive. The berry in itself is allowed, but unfortunately they don't keep for long and are apparently not suited for shipping fresh. However, a freeze dried version made into tablets does exist and this is the version I tried.


There is quite some amount of research on the effect and mechanism of miraculin on our tongue as a google scholar search for "miraculin" reveals. The first scientific report was in Nature as early as in 1968 (correction: first time published in 1965). There is also research indicating that other plants exhibit similar effects, such as curculin from the Curculigo latifolia plant. The miraculin protein structure shown here is taken from the Swiss protein structure homology-modeling service.*


10 Nov 2010

How small are actually the things food is made of?

How small are single plant cells, proteins, sugar molecules? What about those things that spoil our food: bacteria, enzymes? All of them are really small, but when things get this small it is often difficult to grasp that there are huge differences in smallness as well. Below is a tip on how you might get to grips with this.

When dealing with food we talk or read about proteins, carbohydrates, plant cells, enzymes, bacteria and lots of different "really small things". Enzymes react, making fruit brown, proteins and sugars react to give what we perceive as brown coloured and pleasant smelling bread crust. Plant cells absorb or lose water through osmosis to become hydrated or dried, resulting in crunchy or dry/flabby vegetables or fruit. Bacteria and fungi either help us making leavened bread or yogurt, or they spoil our food rendering it unappetizing or even unhealthy.

Usually we talk of these things as macroscopic entities: proteins = eggs, fungi = visible mould on old bread, carbohydrates = sugar in the sugar cup. However, some times these are referred to in terms of their microscopic properties, and this is among the challenges when teaching about food (many of these things are actually submicroscopic, but in educational context we commonly refer to this as the "micro level").

The concept of "smallness"
During my time of teaching, I've realised that many people in general have not reflected on several aspects of this feature:
  1. there is indeed a microscopic world behind the macroscopic sensible/tangible world, and the latter is often a reflection of the former (after all, eggs are cooked because protein molecules react in certain ways)
  2. there are huge differences in actual size between these things which we commonly just think of as "really small"

7 Aug 2010

Miraculin!

For some time now, there has been somewhat of a hype about the miraculous berry that makes everything sour taste sweet. Some time ago, I ordered a packet of dried and powdered miracle fruit tablets and gave it a try. The following post gives some background and the results of a truly fascinating experience.

The miracle fruit is a a berry containing the glycoprotein miraculin with the unlikely effect that when your taste buds meet this substance, you taste sour foods as they were sweet. That is, your perception of sourness is altered. In certain parts of the world, the substance has been used for quite long, whereas in USA and Europe it has not yet been cleared for use as additive. The berry in itself is allowed, but unfortunately they don't keep for long and are apparently not suited for shipping fresh. However, a freeze dried version made into tablets does exist and this is the version I tried.


There is quite some amount of research on the effect and mechanism of miraculin on our tongue as a google scholar search for "miraculin" reveals. The first scientific report was in Nature as early as in 1968. There is also research indicating that other plants exhibit similar effects, such as curculin from the Curculigo latifolia plant. The miraculin protein structure shown here is taken from the Swiss protein structure homology-modeling service.*

An ordinary google search gives various producers and web shops for buying the stuff. Adding to the fun are the conspiration theory-like suggestions (two refs.) of the sugar industry's ways of stopping miraculin approval in the USA since the product might reduce the population's consumption of sugar (which of course is beneficial for everyone except the sugar industry). There are also efforts being made on producing the miraculin glycoprotein using genetic engineering methods, and I guess the hope is that one might efficiently produce miraculin or a relative using common plants or organisms such as lettuce or E-coli bacteria (same as is done with production of other proteins/enzymes such as medicinal insulin or rennet for cheesemaking).

4 Aug 2008

Deciphering an old preserves recipe

Teaching food preservation methods combined with science often results in the classical why-questions; why does the recipe tell us to do things this way, and why is that so important (...and is it really that important?)

Autumn means ripe fruit, berries and vegetables, and many of us look forward to harvesting for the coming year. Only a few areas of the world have the benefit of continuous supply of fruit and vegetables (especially we up here in the north), and this has lead to loads of ways to preserve food. Nowadays, however, many of these methods are used for culinary purposes rather than survival. Recently, Martin wrote about cherry jam (I have given a few on his post as well). Also, Hervé This has written about culinary proverbs and old wives tales, "culinary precisions" as he terms them, some being sound advice from a scientific viewpoint, some being directly misleading, and others probably not making that a big difference.

So, I thought this might be a good time to take a recipe for sugar-preserved pears and have a closer look at it, step by step. It is in fact a quite fun exercise.

Traditional sugar-preserved pears «the old fashioned way» (generic recipe)
  1. Heat jar in oven or water by slowly increasing the temperature to above 100 °C and keeping it at that temperature for a certain amount of time (i.e. 15 minutes). Cool.
  2. Peel pears. Cut in half and remove seeds and core
  3. Make syrup from water and sugar by boiling the syrup until the sugar is dissolved. Leave to cool
  4. Fill a jar with the pears. Fill up with syrup, cold or lukewarm, but not hot
  5. Put the lid loosely on, do not tighten
  6. Place jar in a pot with cold water almost up to the rim of the jar. Heat slowly and keep at boiling point for a certain amount of time (i.e. 8 minutes)
  7. Remove jar from pot and
    Either: leave to cool for a certain amount of time (i.e. 15 minutes). Then tighten the lid
    Or: Tighten the lid while boiling hot
  8. Turn jar upside down and
    Either: store upside down
    Or: leave upside down for a certain amount of time (i.e. 15 minutes)
Taking a closer look
Firstly, the main reason for all these operations is to keep the pears edible for a long time, more specific until the next time ripe pears are at hand (a year, usually...). The two main ways that fresh fruit is spoilt are chemical (enzymes and reaction with oxygen from the air) and biological (microorganisms: bacteria, moulds and yeasts). Even though the methods were developed before the discovery of microorganisms and enzymes, the results of these were evidently clear. The source of enzymes is the fruit itself, whereas microorganisms are ubiquitous: the fruit itself, hands, tools, jar and in the air. So a perfectly sterile fruit would over some time be contaminated by just sitting in the air.
Two important facts: microorganisms thrive and multiply at temperatures between 10 and 40 °C, and die at high temperatures. The trick is thus to avoid the 10-40 °C window. Also, microorganisms need water to thrive and multiply.

So, how much of this procedure makes sense from a scientific point of view? I've marked the steps being most «fishy» with a red asterisk:
  1. Heat jar and lid in oven or water by slowly increasing the temperature to above 100 °C and keeping it at that temperature for a certain amount of time (i.e. 15 minutes)
    Makes sense, but cooling leaves the jar and lid ready for infection. However, they're dry and not prone to being infested

  2. Peel pears. Cut in half and remove seeds and core
    No effect other than possibly infecting the pears from hands, tools and surrounding air

  3. Make syrup from water and sugar by boiling the syrup until the sugar is dissolved. Leave to cool
    Sugar has a preserving function due to its dehydrating effect on microorganisms (a later post will deal with this). Sugar won't kill microorganisms, but inhibit growth. If the syrup is thoroughly boiled, microorganisms in the water and sugar are killed. Cooling the syrup is not recommended if it can be avoided (10-40 °C window)

  4. Fill a cold jar with the pears. Fill up with cold or lukewarm, but not hot, syrup
    Warning: we are in the 10-40 °C window. From a microbiological view, the best would be to add hot/boiling syrup. However, this might damage the fruit, such as turning the surface mushy (in the case of plums, the skin would most likely break).

  5. Put the lid loosely on, do not tighten
    Makes sense. During heating, the contents expand and trapped and dissolved air is expelled (gas solubility is lower at higher temperature). The air above the fruit expands when heated and needs to go somewhere

  6. * Place jar in a pot with cold water almost up to the rim of the jar. Heat slowly and keep at boiling point for a certain amount of time (i.e. 8 minutes)
    We are in the 10-40 °C window for quite some time during slow heating. The historic reason is most likely that old glass types had tensions/stress that would result in the jar cracking from shock heating or cooling. Modern glass production methods solve this by i.e. annealing. My experiences with ordinary jam jars is that they manage shock heating and cooling quite well. If the fruit survives, rapid heating is preferable.

  7. * Remove jar from pot and either leave to cool for a certain amount of time (i.e. 15 minutes). Then tighten the lid, or tighten the lid while boiling hot Leaving the jar open at this point is certainly not a good idea. Cooling results in the air above the fruit contracting, sucking in air from the surroundings (see note). Even though microorganisms might die when entering, thermally stable spores might enter which might develop at a later point. Tightening the lid right away is by far preferable. If you use modern jars with aluminium lids that pop down due to reduced pressure inside the jar, this should happen when the jar cools (if you buy a jar of jam and the lid doesn't pop when you open it, return it and get another). If the lid pops up before or during storage, consume immediately («oh, what a disappointment» ;)).

  8. Turn jar upside down and either store upside down or leave upside down for a certain amount of time (i.e. 15 minutes)
    Makes sense. Getting the lid sterile is always a difficult task. Turning the jar lets the hot contents come in contact with the lid, sterilising it getting rid of a majority of the microorganisms present. One might speculate whether keeping the lid seals moist might also be a reason (why wine is stored lying), but a biologist friend of mine meant that the atmosphere above the fruit would result in a moist enough atmosphere for that purpose, and that the sterilising effect of killing microorganisms is the point here. If that is true, it should not make a difference which way the jars are stored.

Remember that operations conducted in a kitchen are far from sterile procedures. For this reason, many such recipes rightfully ask for two and sometimes three actions with apparently the same purpose.

Finally, while hard cheeses with unwanted mould often are safe to eat if the mould is removed by cutting away a layer of the cheese, stored preserves such as jams, sugar preserved fruit and syrups should be discarded if the seals are broken or visible mould is seen. In the cheese, the microorganisms cannot travel due to the dry and solid structure, whereas diffusion is jams etc. occurs rather easily and the whole jar might very well be contaminated even though the visible mould is removed.

What might be learned/taught
Loads of microbiology. However, since I'm primarily a chemist, I won't venture too far into this. To me, taken that microorganisms are everywhere and that they die when they are heated, the most important things to teach would be (again, from the top of my head):
  • temperature-volume relationships of gases and gas-liquid relationships (popping lids, see note below)
  • critical thinking, don't always believe what you read
  • working systematically, always questioning why should I do this? (see Five cardinal rules in cooking)
In fact, this experiment/recipe might be among the few cases where one can test and predict something rather complicated based on a very limited amount of knowledge, but are often stated as among the most important treats in enquiry based science teaching (quite a paradox, really). Such situations are scarce, and I'm thrilled every time I stumble upon one.

Erik


Note: Heat expanding air is easily illustrated by putting a blown-up balloon into the freezer; it contracts. Take it out, and it expands back to (almost, at least) original size. However, when the jar contents are boiling, the headspace will in fact be filled by mostly steam from the preserves. When this water condenses (in the closed jar), the volume of the steam (now liquid water) is reduced by a factor of ca. 1300(!), resulting in a considerably lowered pressure.


Addendum (6. August)
some statements about sterilisation are modified as common canning does not result in sterile product (hence the need for preservatives such as sugar, salt, acid/vinegar etc.). This way of canning/preserving more resembles high pasteurization which is common in some milk products.

18 Dec 2006

Christmas dinner trimmings - a hot potato? (part one)

Many a Christmas dinner, we end up with the potatoes falling apart in the dish and pale olive-green Brussel sprouts. Does it have to be like this? Using a little scientific knowledge in the kitchen can help.

Part one - potatoes
In Norway, Christmas dinner is often accompanied, amongst several things, by boiled potatoes and Brussels sprouts. The potatoes are often of a mealy sort, and peeled before cooking rather than after.

Mashed potatoes are a result of the outer parts of the potato being cooked too much before the inner parts are tender. Potatoes contain pectin, the cement which holds the cells together. Pectin is soluble in hot water, and when mealy potatoes are boiled, the pectin dissolves in the water. The cement is gone, and the potato fall apart in it’s separate cells. There is, however, an enzyme in the potato that helps the pectin molecules to cross-link internally, so the pectin stays in the potato. This enzyme is active between 50 and 60 °C. The solution is: leave the potatoes in water at this temperature for 20-30 minutes before heating further up, and your potatoes will not fall apart (use a standard cooking thermometer). But beware; the cooking time will be longer. Cooking bacalhau a couple of weeks ago, I had a fascinating experience (in Norway it goes by the name bacalao. Bacalhau is a Portuguese/Brazilian fish dish, in this case a hot pot with tomatoes, potatoes, onion, clipfish, black olives and olive oil). The potatoes were pre-cooked as described above, peeled and cut in large pieces, and added to the hot pot. After 75 minutes simmering, the potatoes were still not tender, and the guests had to wait another 15 minutes. One and a half hour’s simmering before the potatoes were tender! The potatoes, by the way, kept their shape perfectly even when the dish was reheated.
If you deliberately want the potatoes to fall apart, i.e. to thicken soup, you should do the exact opposite: put the pre-peeled potatoes directly in boiling water.

One problem with such pre-cooking is the off-colour (enzymatic browning). This can be fixed by adding a little acid, a tea spoon of vinegar or some lemon juice, or an antioxidant; a C-vitamin tablet or a tea spoon of pure ascorbic acid does the trick. The acid retards the reaction, while the ascorbic acid (C-vitamin) sacrifices itself in the reaction.

A drawback is that vitamin-degrading enzymes are also efficient at temperatures between 50 and 60 °C, so focusing on texture results in lower vitamin content. For everyday dinner I’d put unpeeled potatoes directly in boiling water to deactivate the vitamin-degrading enzymes, alas deactivating the pectin reinforcing ones as well.

Part two will deal with the Brussel sprouts - how to achieve a fresh green colour rather than a pale olive-green colour. A Norwegian version of this post can be found at www.naturfag.no/mat.

Merry Christmas(-dinner)

Erik

Background info:
McGee, H. (2004): McGee on Food and Cooking – An Encyclopedia of Kitchen Science, History and Culture. London: Hodder and Stoughton.

8 Jun 2005

Tomato foam

The Norwegian cook, food writer and weekly source and inspiration (at least to me) Andreas Viestad wrote a fascinating piece on tomato mousse:
Run a tomato or three (cut in pieces) in a blender for five minutes. Running for a shorter time will not give the desired result even though it seems finished. Pour into a bowl and leave for a few hours and you get a mousse-like pink jelly. With reference to prof. Hervé This he guesses that the reason may be liberation of pectin from the crushed tomato skin. Pectin is a natural occurring acidic polysaccharide/carbohydrate which contributes to stiffness in some fruit/berry jams and jellies.

I tried this with moderately satisfactory result; a fairly ok foam/mousse on the top with a more soggy mass at the bottom of the glass.

SUGGESTIONS ON WHY THIS DOES WORK (or not work) AND EXPERIMENTS TO TEST THE HYPOTHESES
If pectin is the big point
- using ripe tomatoes should give poorer result that unripe (or less ripe) as the pectin is broken down during ripening. This is by the way the reason why you should use not very ripe berries/fruit when making jam/jelly and more ripe when making juice/syrup. Vice versa: ripe/unripe tomatoes should not make a difference if pectin is not involved.
- Pectin is located in the skin, cell walls and between cells of the tomato. Breaking the cell walls (destroying the cells) by blending should therefore not be a critical point.

If breaking the cells walls is of vital importance
- freezing the tomatoes should be very effective in breaking the cell walls as expansion and formation of sharp crystals by loads of water inside the tomato will cut/explode the cells from within. After freezing, long blending time should not be necessary. Why this should be, I'm not sure. A biologist colleague meant that a possible reason may be that enzymes within the cells are liberated and can react with other parts of the tomato.

Suggested (comparative) experiments:
For consistent experiments, the same blender speed should always be used, and the container should be rinsed between each blending. Washing unnecessary? (most of the tomato is water soluble, but important compounds may be water insoluble)

1) Blending time - cut four tomatoes in two and divide in two heaps (two halves from the same tomato in each group). This way, I'll have to identical heaps. Run one heap for 1-2 minutes, the second for at least 5 minutes. Pour into separate bowls and leave for a few (3-5?) hours.

2) Breaking cell walls - cut four tomatoes in two and divide in two heaps as above. Put each heap in a plastic bag, leave one in the fridge and the other in the freezer overnight. Thaw the frozen tomatoes and run each heap in the blender for an identical period of time. Pour into separate bowls and leave for a few (3-5?) hours.

3) Ripe vs. unripe and blending time double experiment - this is a little less stringent that the point above, but worth a try. You need ripe and unripe (less ripe) tomatoes, ideally from the same plant (grow your own). Make four heaps:
a1) Ripe + short blending time
a2) Ripe + long blending time
b1) Unripe + short blending time
b2) Unripe + long blending time
Run the four heaps separately as for 1). Pour into separate bowls and leave for a few (3-5?) hours.


I'll have to follow up this some time soon (maybe wait for our own tomatoes to ripen?). Results and reflections will be published.

Erik


Addition 11. May 2010: Report from The Flemish Primitives 2010 by Martin "khymos" Lersch has some interesting and possibly relevant info on this matters as well as references. Maybe a solution is to be found therein?